Stereoscopic Rendering: Settings, Formats and Viewing
How we researched this: written by Owl3D from published sources, all 14 listed at the end.
Short answer
Stereoscopic rendering means rendering a scene twice, from two cameras a small distance apart, so each eye gets its own image [3]. Three settings decide the result: the eye distance (interocular distance), the convergence distance (what lands on the screen plane), and the camera mode, where off-axis is the correct choice and toe-in adds vertical parallax [1][3]. Save the pair in a layout your display reads: side-by-side, top-bottom or anaglyph [1].
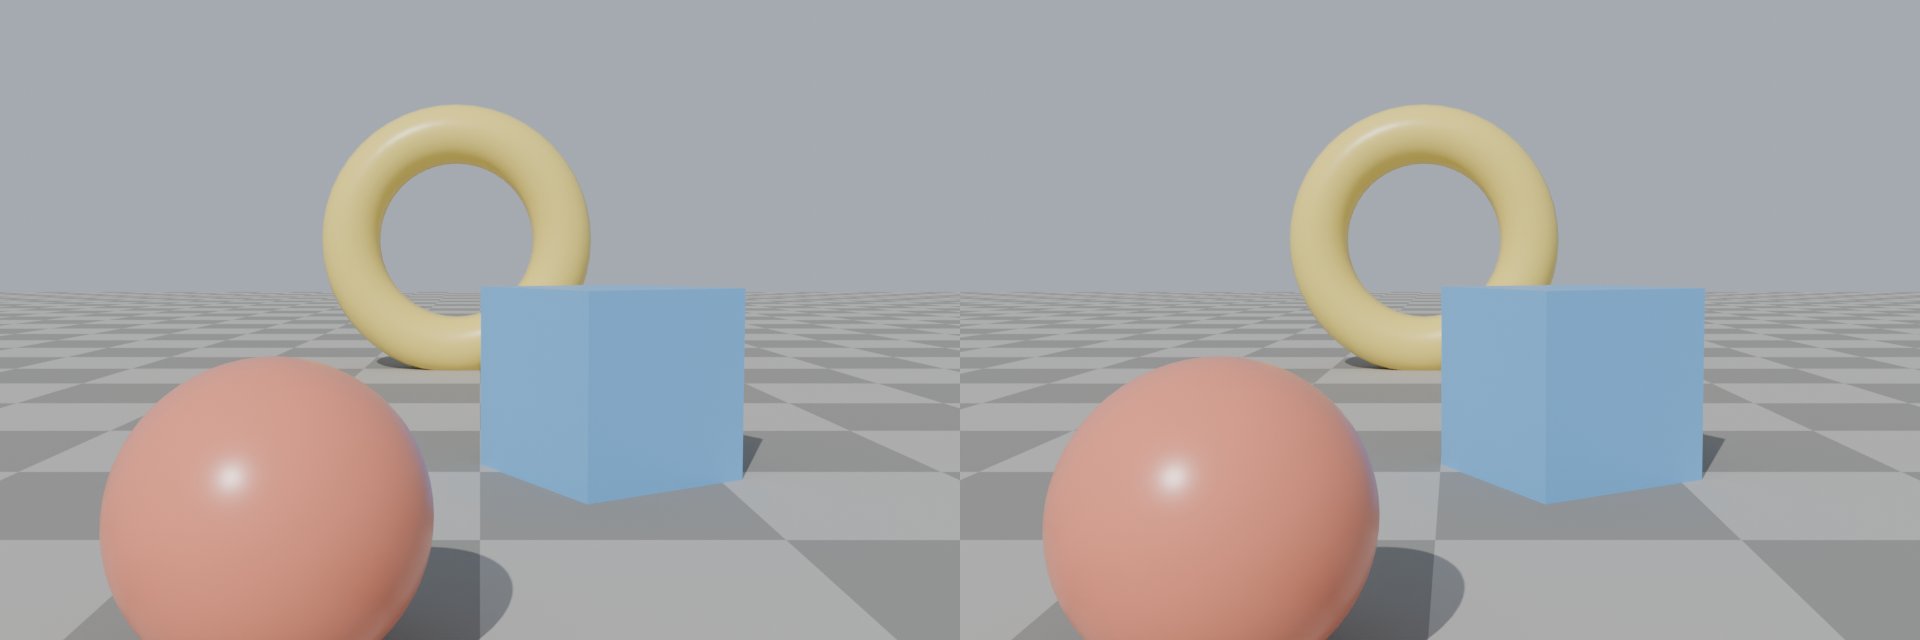
Our stereo render: left eye on the left, convergence on the blue cube 4 m from the camera. Owl3D, rendered in Blender 4.2 (own scene), 2026-11-17.
Key takeaways
- Whatever sits at the convergence distance appears on the screen; nearer things come out, farther things go behind. See convergence.
- Use off-axis cameras, not toe-in, which adds vertical parallax [3]. See camera mode.
- A rule of thumb for eye distance is 1/30 of the convergence distance [3]. See eye distance.
- Full SBS keeps each eye at full width; Half SBS squeezes both into one normal frame [10]. See which layout.
- View it with your own eyes, red-cyan glasses, a headset, a 3D TV or a glasses-free monitor. See viewing.
What convergence does: what sits on the screen
The convergence distance (Blender calls it the Convergence Plane Distance) is the depth that the viewer sees at the screen [1]. An object at that distance has zero parallax: its left and right images fall in the same place [3]. Objects in front of it get negative parallax and appear in front of the screen; objects behind it get positive parallax and appear behind the screen [3].
We tested this on our own Blender scene: a sphere 2 m from the camera, a cube at 4 m and a ring at 8 m, rendered off-axis with the convergence at each object in turn, and once with toe-in at 4 m. Then we measured how far each object moves between the two images.
| Camera, convergence | Sphere (2 m) | Cube (4 m) | Ring (8 m) |
|---|---|---|---|
| Off-axis, 2 m | 0 | +15 | +23 |
| Off-axis, 4 m | −15 | 0 | +7 |
| Off-axis, 8 m | −22 | −8 | 0 |
| Toe-in, 4 m | −14 | +1 | +8 |
Horizontal shift of the right image against the left, in pixels at 960 px per eye, by block matching. 0 is on the screen, minus in front, plus behind.
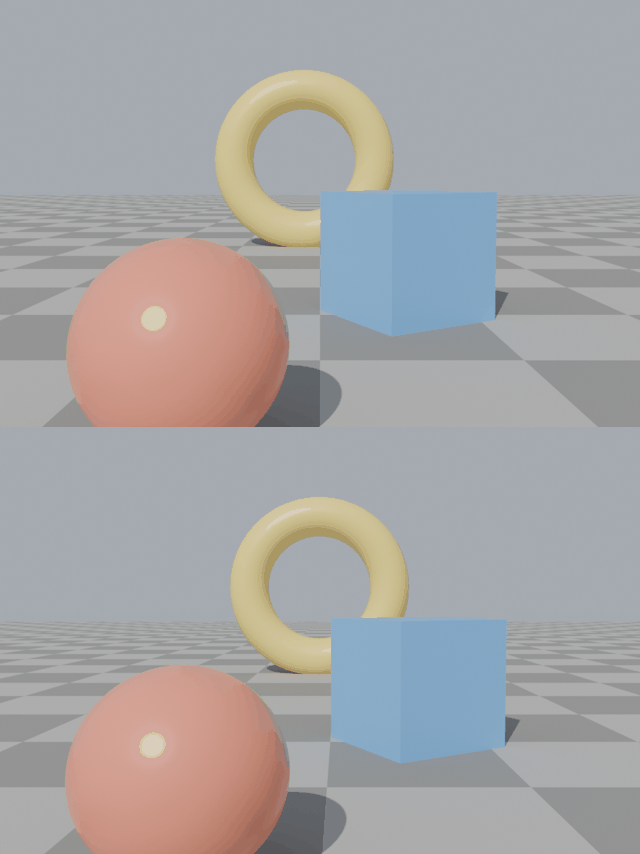
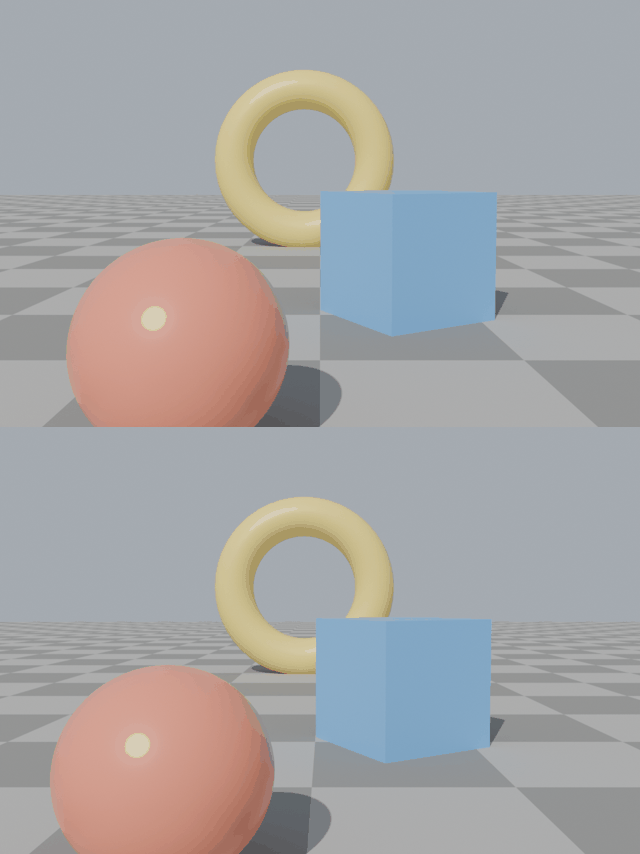
Which to choose? Pairs whose objects go back into the screen are generally easier to view, so put the convergence closer to the camera than the objects of interest; the effect is less dramatic than objects that come out [3]. Keep objects no closer than half the convergence distance [3]. Negative parallax is harder to fuse, especially when an object is cut by the frame edge [3]. How much parallax a screen can take depends on its size: see 3D parallax and screen size.
Eye distance
The interocular distance is the distance between the two cameras [1]. Paul Bourke's rule of thumb: 1/30 of the convergence distance, which works in almost all cases whatever the model's scale [3]. About 1/20 is generally the comfortable maximum; too large a separation is called hyper-stereo [3].
For reference, in the 2012 survey of US Army personnel the average distance between the pupils was 61.7 mm for women and 64.0 mm for men [9]. We rendered our scene with 6.5 cm.
Choose it at render time: convergence can be changed in post-production, but a different interocular distance changes which parts of the scene each camera sees [1]. In Unity, most VR devices supply the eye separation themselves, and setting it then has no effect [4].
Camera mode: off-axis, not toe-in
Blender offers three modes [1]:
- Off-Axis. The cameras are separated by the interocular distance and shifted inwards to converge at the convergence plane; Blender calls it the ideal format [1].
- Parallel. Two cameras that do not converge; the pair must be converged manually before viewing. Common when combining live footage with renders [1].
- Toe-in. The cameras are rotated instead of shifted. It is rarely used in modern 3D productions [1].
Toe-in still looks stereoscopic, but it introduces vertical parallax that grows towards the edges and increases discomfort [3]. Off-axis has no vertical parallax; it needs an asymmetric camera frustum [3]. Our toe-in render's horizontal shifts were within one pixel of off-axis (table above); we did not measure the vertical shift.
How to set it up
Blender
Blender's multi-view tools work with both EEVEE and Cycles [2].
- Turn on Stereoscopy. In the Output Properties, enable Stereoscopy for the scene [1].
- Set the camera. Select the camera, and in its Stereoscopy settings choose the Mode (Off-Axis), the Interocular Distance and the Convergence Plane Distance [1]. The 3D Viewport can show the convergence plane [1].
- Choose the pivot. Center Pivot builds a new camera for each eye; Left or Right keeps the existing camera as that eye [1].
- Choose the output. In the Views Format, pick individual files per view, or a Stereo 3D layout: side-by-side (with a cross-eye option), top-bottom, anaglyph or interlace [1].
Individual files in a lossless format such as PNG or OpenEXR keep all your data; of the stereo layouts, only Top-Bottom and Side-by-Side without the Squeezed Frame option do, while anaglyph and interlace lose some [1]. We rendered in Cycles, saved each eye as its own image and joined them afterwards.
Unity
For a headset, set the Render Mode under Edit > Project Settings > XR Plug-in Management: Multi-pass, or Single-pass instanced, which uses less CPU [6]. The Camera's stereoSeparation and stereoConvergence properties set the distance between the virtual eyes and the distance at which they converge [4][5].
For a flat side-by-side image, you can use two cameras and draw each into one half of the screen with the Camera's Viewport Rect [7]. With Physical Camera on, Lens Shift X makes a camera's frustum oblique [7], and an asymmetric frustum is what an off-axis pair needs [3].
3ds Max
Autodesk's Stereo Camera plug-in for 3ds Max 2017 to 2027 creates stereoscopic camera rigs, shows Left Eye, Right Eye, Center or Anaglyph views in the viewport, and draws in-scene 3D volumes to help adjust the valid stereo zones [8].
Your own OpenGL code
Keep the two cameras' view directions parallel, move each one half the eye separation to the side, and shift each frustum with glFrustum() by 0.5 × eye separation × near plane ÷ convergence distance [3]. For side-by-side output, draw each eye into one half of the window with glViewport(); for frame-sequential (quad-buffer) stereo, draw into GL_BACK_LEFT and GL_BACK_RIGHT [3].
Which layout to export
Pick the layout your display or player reads; pictures of each are in 3D video formats.
| Layout | What it is | Read by |
|---|---|---|
| Full SBS | Both eyes side by side at full width: 3840 x 1080 for a 1080p pair [10] | XR glasses such as XREAL One (Full SBS setting) [10] |
| Half SBS | Both eyes squeezed into one 1920 x 1080 frame [10] | XR glasses such as XREAL One (Half SBS setting) [10] |
| Top-bottom | The two eyes one above the other in one frame [1][10] | 3D TVs [11]; Meta Quest browser [12] |
| Anaglyph | Both eyes in one picture, filtered in two colours [1] | Red-cyan glasses [1][14] |
| Separate files | One image per eye [1] | Your own compositing or player |
On XR glasses, match the Half or Full SBS setting to the video's resolution [10].
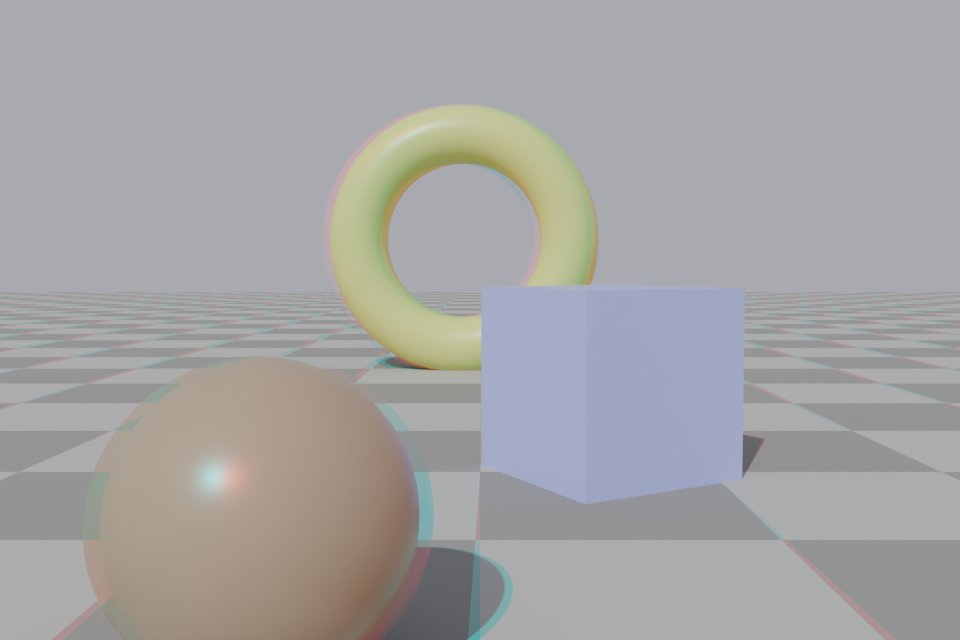
How to view it on a 3D stereo display
A stereo 3D display shows one view to the left eye and another to the right [14]; how two flat images look deep is explained in what stereoscopic 3D is. Your choices:
| Where | Export as |
|---|---|
| Your eyes alone | Side-by-side: parallel (left image on the left) or cross-eyed (swapped) [13]; practise on this pair |
| Red-cyan glasses | Anaglyph [1]; see anaglyph 3D |
| VR headset (Meta Quest browser) | Left-right or top-bottom [12]; see watching in VR |
| 3D TV | Side-by-side or top-and-bottom [11] |
| XR glasses | Full or Half SBS [10] |
| Glasses-free 3D monitor | Check the maker's list of layouts; compare models in glasses-free 3D monitors |
On the Owl3D Shift
Owl3D, the publisher of this guide, makes the Shift. The Owl3D Shift is a 14-inch 4K glasses-free 3D display that you use as a second monitor beside a computer running the Owl3D app. Start SBS Mode in the app and show your Full SBS, Half SBS or top-bottom render on the Shift in any viewer or player: it appears in 3D, to one viewer at a time, at 1920 x 2160 per eye. Its 3D Model Viewer opens .glb, .gltf and .3mf files, with controls to rotate, pan, zoom and adjust depth. It is a desk display, not a screen for a room.
Frequently asked questions
Which camera mode should I use?
Off-axis. Toe-in adds vertical parallax and discomfort; off-axis adds none [3].
Can I change the depth after rendering?
Only the convergence. A different eye distance changes what each camera sees [1].
Sources (14)
- Blender 4.2 LTS Manual, "Stereoscopy: Usage". https://docs.blender.org/manual/en/4.2/render/output/properties/stereoscopy/usage.html (opened 2026-11-17)
- Blender 4.2 LTS Manual, "Stereoscopy: Introduction". https://docs.blender.org/manual/en/4.2/render/output/properties/stereoscopy/introduction.html (opened 2026-11-17)
- Paul Bourke, "Calculating Stereo Pairs" (July 1999), with "Creating correct stereo pairs from any raytracer" (February 2001) and "Off-axis frustums - OpenGL" (July 2007) on the same page. https://paulbourke.net/stereographics/stereorender/ (opened 2026-11-17)
- Unity Scripting Reference, "Camera.stereoSeparation". https://docs.unity3d.com/ScriptReference/Camera-stereoSeparation.html (opened 2026-11-17)
- Unity Scripting Reference, "Camera.stereoConvergence". https://docs.unity3d.com/ScriptReference/Camera-stereoConvergence.html (opened 2026-11-17)
- Unity 6.6 User Manual, "Introduction to stereo rendering". https://docs.unity3d.com/Manual/SinglePassStereoRendering.html (opened 2026-11-17)
- Unity 6.6 User Manual, "Camera Inspector window reference for the Built-In Render Pipeline". https://docs.unity3d.com/Manual/class-Camera.html (opened 2026-11-17)
- Autodesk Design and Make Marketplace, "Stereo Camera for Autodesk 3ds Max 2017 to 2027". https://marketplace.autodesk.com/apps/65e59a21-3226-49ec-97d1-9e799d121b24 (opened 2026-11-17)
- Wikipedia, "Pupillary distance" (table from the 2012 Anthropometric Survey of US Army Personnel). https://en.wikipedia.org/wiki/Pupillary_distance (opened 2026-11-17)
- XREAL Tutorials, XREAL One series, "3D Mode". https://tutorials.xreal.com/docs/glasses/one-series/osd/3d-mode/ (opened 2026-11-17)
- Wikipedia, "HDMI" (version 1.4a). https://en.wikipedia.org/wiki/HDMI (opened 2026-11-17)
- Meta for Developers, "Browser Video Support". https://developers.meta.com/horizon/documentation/web/browser-video/ (opened 2026-11-17)
- Wikipedia, "Stereoscopy" (Freeviewing). https://en.wikipedia.org/wiki/Stereoscopy (opened 2026-11-17)
- Wikipedia, "3D display" (redirected from "Stereo display"). https://en.wikipedia.org/wiki/Stereo_display (opened 2026-11-17)