How to Make Lenticular Prints at Home
How we researched this: written by Owl3D from published sources, all 15 listed at the end.
Short answer
You need an inkjet photo printer, glossy or matte photo paper, a lenticular lens sheet of 60 LPI or less, and interlacing software. Make 2 frames for a flip or about 10 views for 3D. Interlace them to your sheet's real pitch, which a printed pitch test tells you. Print at 100% scale with borderless printing off, then lay the sheet on the print, line it up and laminate it [1][2][5][8][15].

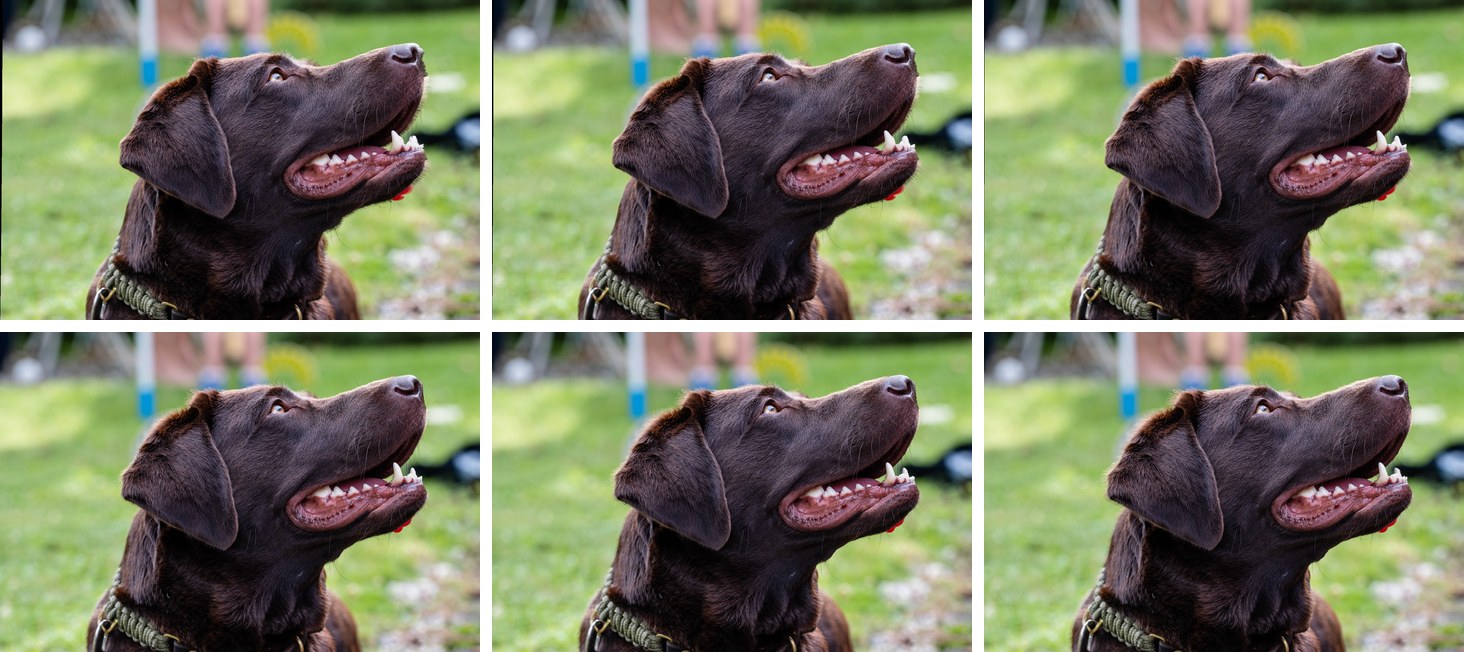
Six views for a 3D lenticular, made from one ordinary photo by an AI depth model. Our own output, 2026-11-19. Photo: Dktue, CC0.
Key takeaways
- Buy a 60 or 40 LPI sheet for a hand-held inkjet print [2]. See what to buy.
- A flip needs 2 frames. Animation needs about 5 to 12. 3D needs about 10 to 20 views [1][6]. See frames.
- Do the pitch test: a 0.1 LPI error is enough to spoil the print [6]. See pitch test.
- First print blurry or doubled? See what went wrong.
- Have only one photo and want 3D? See 3D views from one photo.
What to buy
| Item | What to get | Why |
|---|---|---|
| Lens sheet | 60 LPI or less, acrylic or APET, with adhesive backing if you can [2][8][15] | On inkjet, 70 to 75 LPI is rarely excellent [8] |
| Printer | An inkjet photo printer [5][15] | Laser printers are usually not ideal [15] |
| Paper | Glossy or matte inkjet photo paper [5] | Copier paper soaks up the ink and blurs [5] |
| Mounting | Double-sided adhesive or a pre-glued sheet, and a cold laminator or a wallpaper hand tool [4][13] | A hot laminator can melt the lens [13] |
| Software | Free interlacing software or Photoshop [4][10][14] | See interlace |
Pick the LPI from your printer and print size. LPI is lenses per inch. ViCGI, which sells sheets to hobbyists, puts it this way: "For small inkjet projects, choose a lenticular sheet with 60 LPI or below. Also choose an LPI that is a factor of the printer's horizontal resolution." [2] HP and Canon work in multiples of 600 dpi, so 60, 50, 40, 30, 20, 15 and 10 LPI all work. For Epson (720 dpi), use 60, 40, 30, 20, 15 or 10 [2]. A 60 LPI sheet is for viewing from 1 to 10 feet [1]. For a first project, eufyMake calls 50 LPI "the most forgiving starting point" [15].
Pick the lens type from the effect. A narrow-angle lens (15 to 30 degrees) is for 3D. A wide-angle lens (40 to 55 degrees) is for flips and animation [1][2].
ViCGI sells sheets to hobbyists [2]. We found no fixed price to quote: its shop prices each order by size, quantity and LPI [3].
How many frames each effect needs
| Effect | Frames | Lens ridges run |
|---|---|---|
| Flip (one picture changes to another) | 2 is best, more than 3 is hard [1] | Horizontal: you tilt the card up and down [11][15] |
| Animation or morph | 5 to 12 (xTool), 10 to 20 for a morph (ViCGI) [1][6] | Left and right, or up and down [5] |
| 3D depth | 10 to 20 views [1], 8 to 20 at xTool [6] | Vertical: each eye sees a different view [11][15] |
The views your printer can hold. Divide the printer's resolution by the LPI. A 600 dpi HP printer and a 60 LPI sheet give 600/60 = 10 frames [14]. An Epson at 720 dpi gives 720/60 = 12 [13]. ViCGI's rule of thumb: pixels under each lens times LPI should come to 300 or more [4]. Put the frames in order from left to right. For 3D, number the views from low to high as the camera moves to the right [12][13].
For a flip, give both pictures a similar contrast. A white background next to a black one bleeds through and shows as a ghost [1][15].
Interlace the frames
Interlacing cuts each frame into thin strips and lines them up with the lenses [1].
- SuperFlip!5 and Super 3-D Genius: free to VueThru customers, for flip, morph, animation and 3D [10].
- Lenticular Image Creator: free for personal use. It does not print, so open its file in GIMP to print [14].
- ViCGI's online interlacer: in the browser, for left-and-right flips and morphs up to 20 inches [5].
- 3DMasterKit (Triaxes): paid, Windows only. It adds a depth map to a layer for 3D [7][9].
- Photoshop by hand: mask one image with a stripe pattern and merge the layers [4].
Set the file resolution to the pixels under each lens times the real LPI from your pitch test. ViCGI's 2-image flip uses 6 pixels: 6 x 50.1 = 300.6 [4].
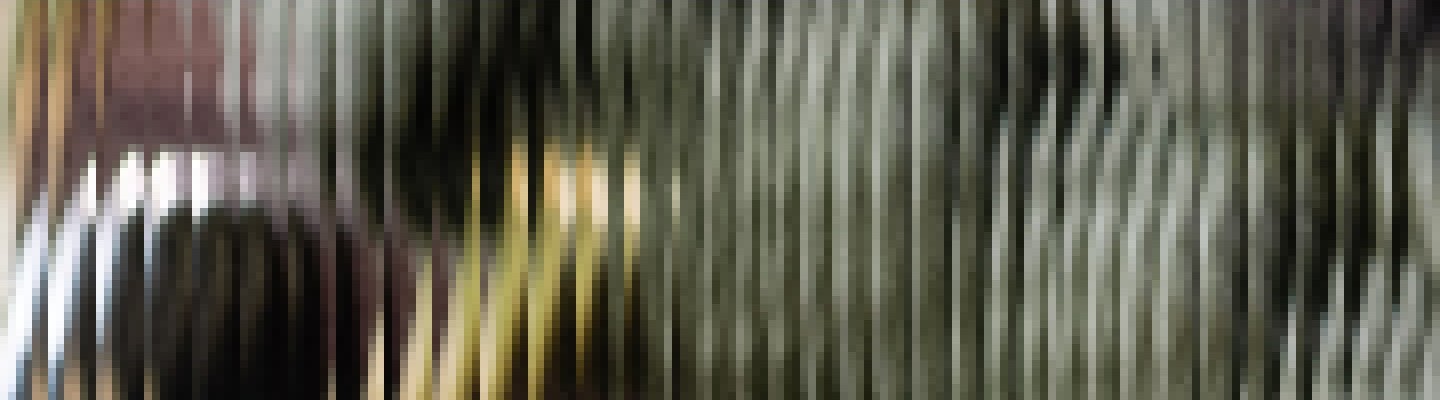
Do the pitch test first
A "60 LPI" sheet is not always exactly 60. ViCGI: "a 60-LPI lenticular sheet might measure anywhere between 59.7 and 60.3 LPI due to production deviations." [4] A "720 dpi" printer may print at 719.8 dpi [4]. xTool found that "An error of 0.1 LPI causes visible banding, and the images will not switch when you tilt the card." [6]
- Print the pitch test for your sheet's LPI on the printer and paper you will use, with no scaling [4]. Ours is below.
- Lay the sheet on top, lined up with the lines on one side [4].
- Tilt it and find the band that changes color all at once, with no waves. The value next to it is your real LPI [4][8]. Look with your eyes, not through a phone camera [6].
- Refine if you want. Make a second test in steps of 0.01 around that value [8].
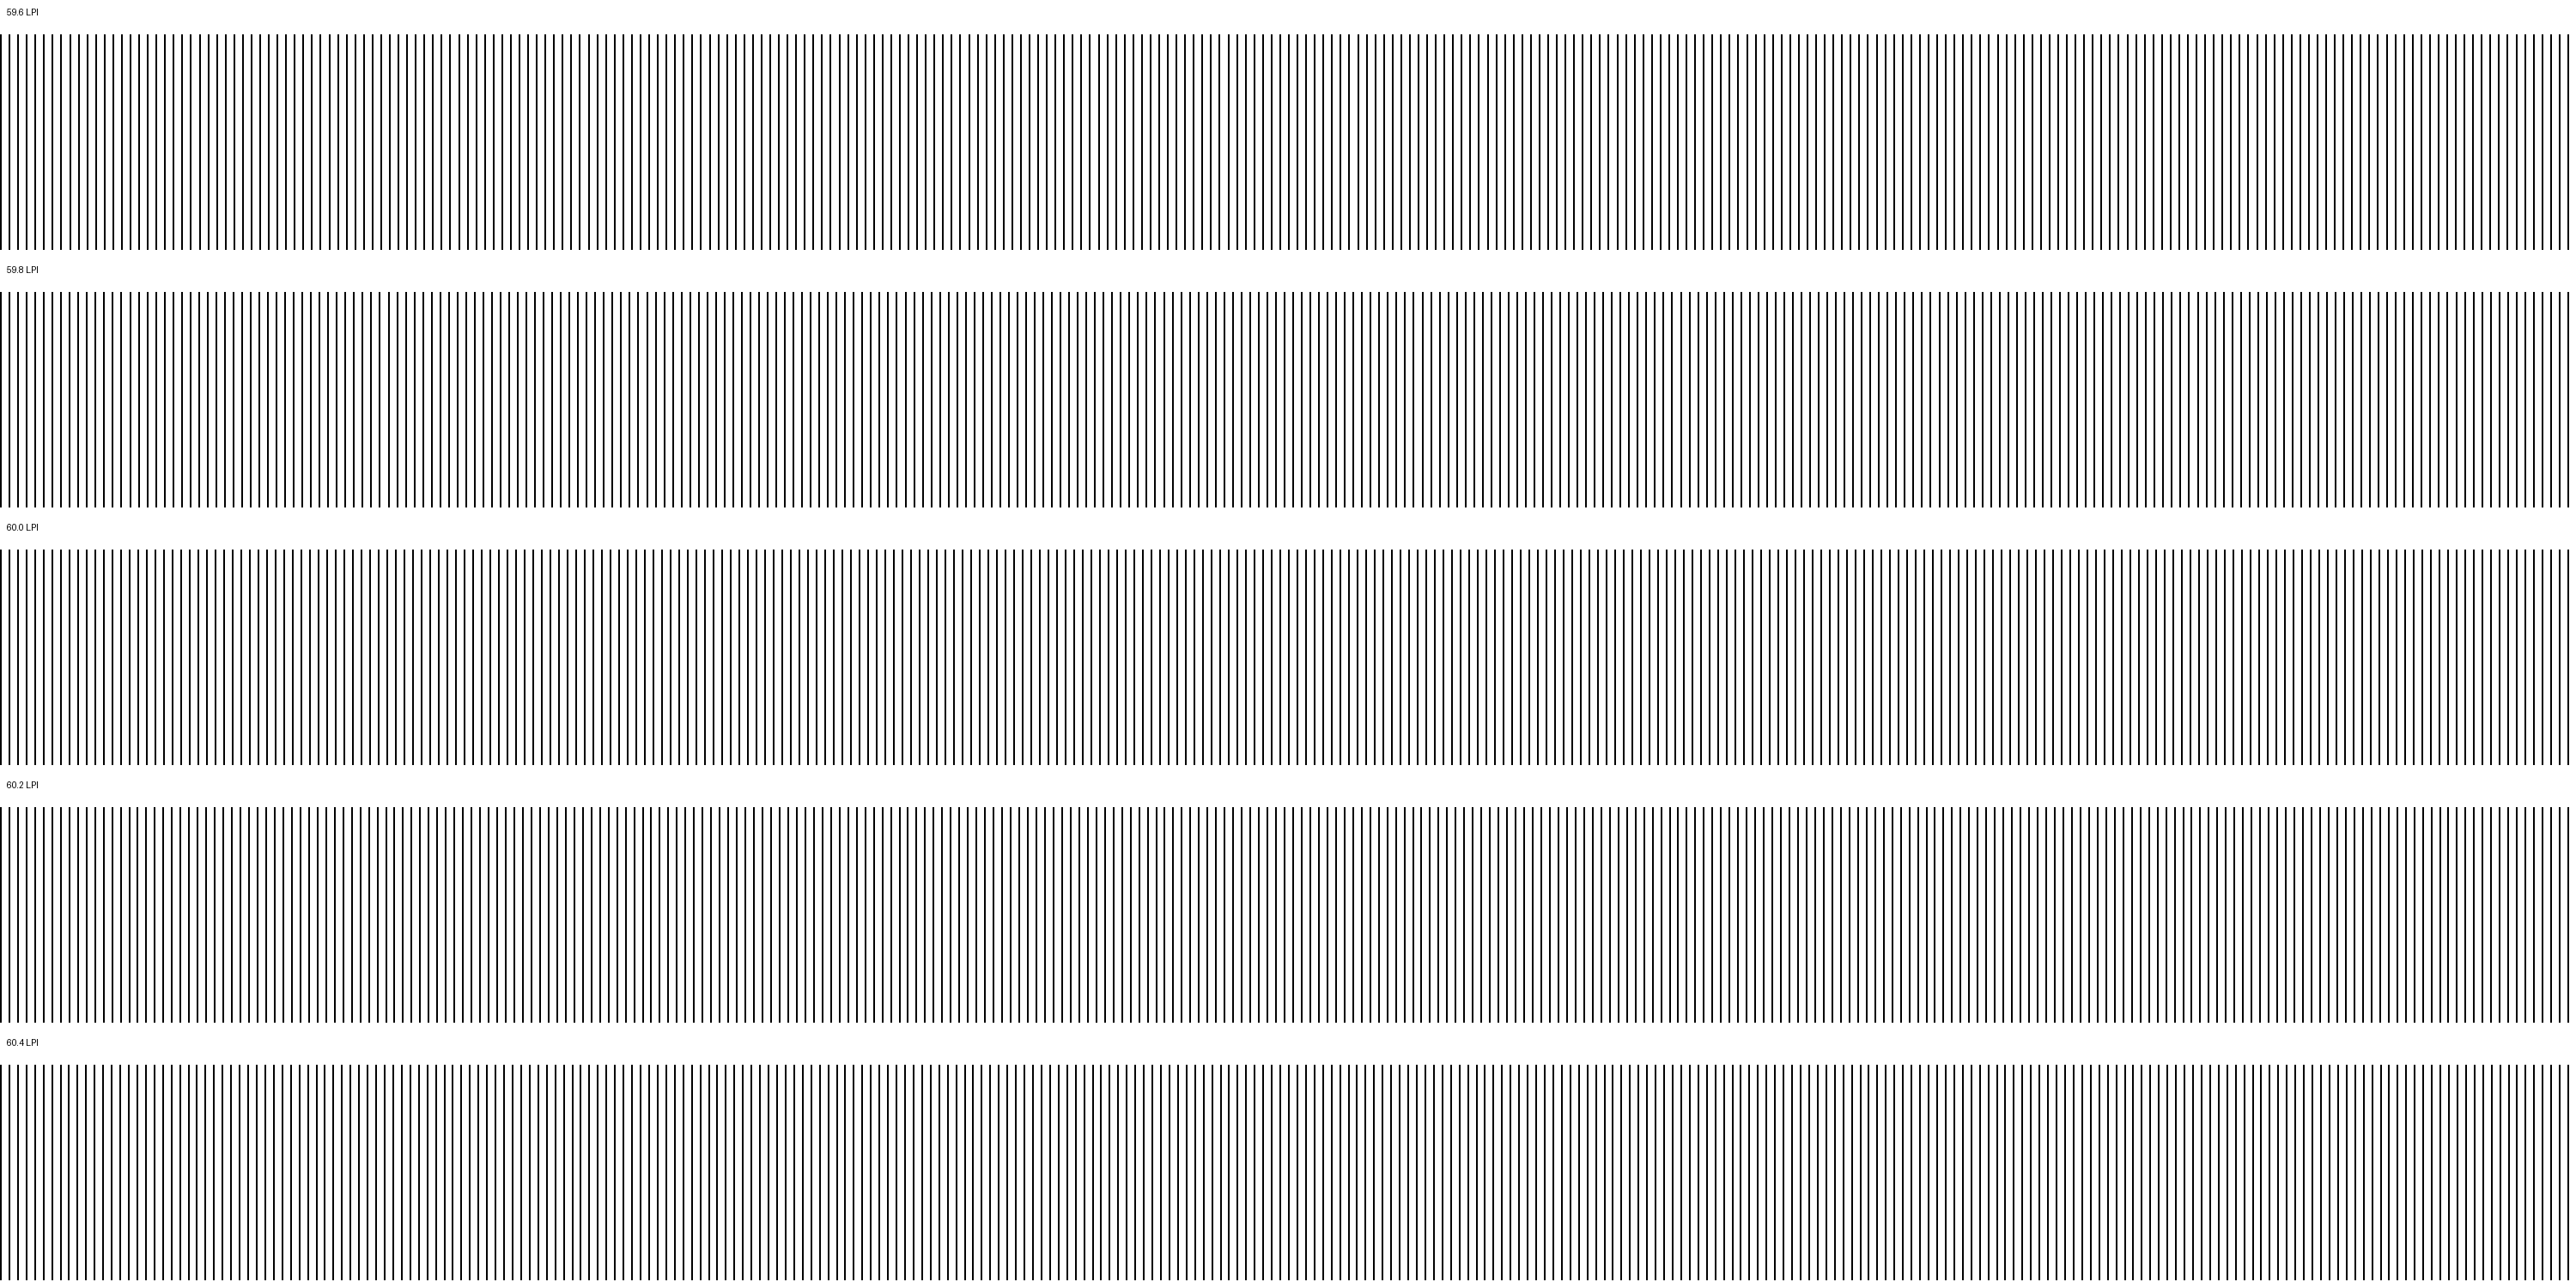
Do the test again for every new combination of lens, printer, paper and printer settings [8]. Look at the test from the distance you will view the print from, because the best pitch depends on it [8].
Print, line up and laminate
- Cut the sheet first, parallel to the ridges. A crooked cut makes the image flip crookedly [15].
- Print at the exact size. Turn borderless printing off [8]. Check that the driver does not shrink the file by 1% or 2% to fit the margins [15].
- Feed the paper across the lens direction. Printers are more accurate in the direction the print head moves [13].
- Peel only a half-inch strip of the backing along one edge [15].
- Line it up. Rotate the lens very slightly left and right until the picture turns clear, then press the edge down [15].
- Laminate slowly with a cold laminator, a little adhesive at a time, to keep air out [13][15].
Why your print looks blurry or doubled
| What you see | Likely cause | Fix |
|---|---|---|
| Two pictures at once (ghosting) | Mismatched pitch, poor alignment or too many frames [1] | Repeat the pitch test, realign, use fewer frames [1][6] |
| A ghost of a dark area on a light one | Too much contrast between frames [12][15] | Even out the contrast [1] |
| Stripes along the lenses (banding) | A small resolution mismatch [1][12] | Measure the LPI again [6] |
| Nothing changes when you tilt | LPI far off, or the wrong direction set in the software [6] | Check the pitch and the direction setting [6] |
| Everything blurry | Sheet not pressed flat, or not lined up [6] | Press it flat and line it up again [6] |
| Never sharp, however you turn the lens | The printer shrank the image by 1% or 2% [15] | Print at 100% scale, no borders [15] |
Photographs and textured pictures rarely show banding [12].
3D views from one photo
At 600 dpi and 60 LPI, a 3D lenticular needs at least 10 views of the scene, each from a little further right [9]. A camera on a sliding rail can take them [7][11]. With one ordinary photo you can make them from a depth map instead: a grayscale picture in which white is near and black is far [14]. Software such as Frame Sequence Generator 5 or Triaxes StereoTracer turns the photo and its depth map into a row of views [9][14].
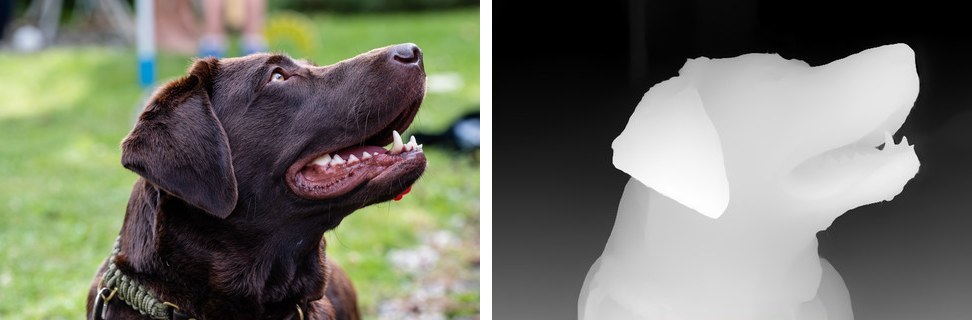
The Owl3D desktop app writes a grayscale depth map on your computer from a .jpg or .png photo, and also a full side-by-side image (a left and a right view). It runs on Windows and on Apple silicon Macs (macOS 14 or later), up to 100 photos a batch; the free plan caps photos at 1280 px. Owl3D, the publisher of this guide, makes the app. The depth is the model's estimate, not a second photograph, so the edges of the subject can stretch. To check the depth first, the free wigglegram maker makes in-between views from one photo in your browser and saves them as a GIF or MP4.
From Owl3DOwl3D converterA desktop app for Windows and Mac that turns 2D videos and photos into 3D.For very large images or many copies, you would more likely work with a commercial printer [13]: see where to order a custom lenticular print. How the lens itself works: what a lenticular lens is.
Frequently asked questions
What is the best software for 3D lenticular prints?
For 3D from one photo, pick a program that takes a depth map. 3DMasterKit (Windows, paid) adds a depth map to a layer [7][9]. Frame Sequence Generator 5 makes the views from a photo and its depth map [14]. For flips and morphs, SuperFlip!5 is free to VueThru customers [10], and Lenticular Image Creator is free for personal use [14].
Which LPI should I buy for an inkjet printer?
Buy 60 LPI or less [2]. For a first project, eufyMake calls 50 LPI "the most forgiving starting point" [15]. On inkjet, 70 to 75 LPI is rarely excellent [8].
Can I interlace without a lenticular program?
Yes, in Photoshop: mask one image with a stripe pattern and merge the layers [4]. You still need the real pitch from a pitch test (see the pitch test).
Sources (15)
- ViCGI, "3D Lenticular Printing FAQs". https://vicgi.com/lenticular-faqs.html Opened 2026-11-19.
- ViCGI, "Choosing the Right Lenticular Sheet for an Inkjet Printer". https://vicgi.com/DIY-lenticular-print.html Opened 2026-11-19.
- ViCGI, "Buy Lenticular Lens sheets". https://vicgi.com/lenticular-lens.html Opened 2026-11-19.
- ViCGI, "The Printer's Guide to Lenticular Printing". https://vicgi.com/lenticular-printing-guide-for-printers.html Opened 2026-11-19.
- ViCGI, "Online Lenticular Interlacing App". https://vicgi.com/lenticular-interlacing.html Opened 2026-11-19.
- xTool, "Lenticular Card Printing Guide". https://support.xtool.com/article/3802 Opened 2026-11-19.
- Triaxes, "3DMasterKit". https://triaxes.com/products/3dmasterkit/ Opened 2026-11-19.
- Triaxes, "Lenticular pitch test". https://triaxes.com/docs/Pitch-test-en/Description.html Opened 2026-11-19.
- Triaxes, "FAQ". https://triaxes.com/faq/ Opened 2026-11-19.
- VueThru, SuperFlip!5 and Super 3-D Genius request page. https://www.vuethru.com/filedownload.html Opened 2026-11-19.
- LA Photo Party, "Getting Started with Lenticular Printing". https://support.laphotoparty.com/support/solutions/articles/5000852772-getting-started-with-lenticular-printing Opened 2026-11-19.
- Parallax Printing, "Lenticular File Prep". https://parallaxprinting.squarespace.com/lenticular-file-prep Opened 2026-11-19.
- UCSF Computer Graphics Lab, "Lenticular Images" (Chimera User's Guide, August 2012). https://www.cgl.ucsf.edu/home/meng/docs/UsersGuide/lenticular.html Opened 2026-11-19.
- 3D Stereoscopic Photography blog, August 2014 posts. https://3dstereophoto.blogspot.com/2014/08 Opened 2026-11-19.
- eufyMake, "Lenticular Printing: How to Make Lenticular Prints at Home". https://us.eufymake.com/blogs/printing-guides/lenticular-printing Opened 2026-11-19.