Tutorial
Tutorial
Watch Movies on Meta Quest: The Setup Most New Owners Miss
Watch Movies on Meta Quest: The Setup Most New Owners Miss
|
5
min read

Congrats on the new headset. Here's the honest answer most setup guides skip.
Quest's default movie experience is a floating 2D screen. It's larger than your TV, and the privacy is real — but it's still flat. To actually use what the hardware is capable of, you need one more piece.
The Default Setup (and Its Limit)
Out of the box, Quest lets you watch movies through apps like the Meta TV app, YouTube VR, or a web browser. The screen is big. The experience is fine.
But everything you watch this way is 2D. Your brain is wearing a spatial computing device, and the content has no depth. Most people notice this as a vague underwhelm — "it's like a big TV, I guess" — and eventually go back to their couch.
The hardware isn't the problem. The content format is.
The Setup That Actually Works
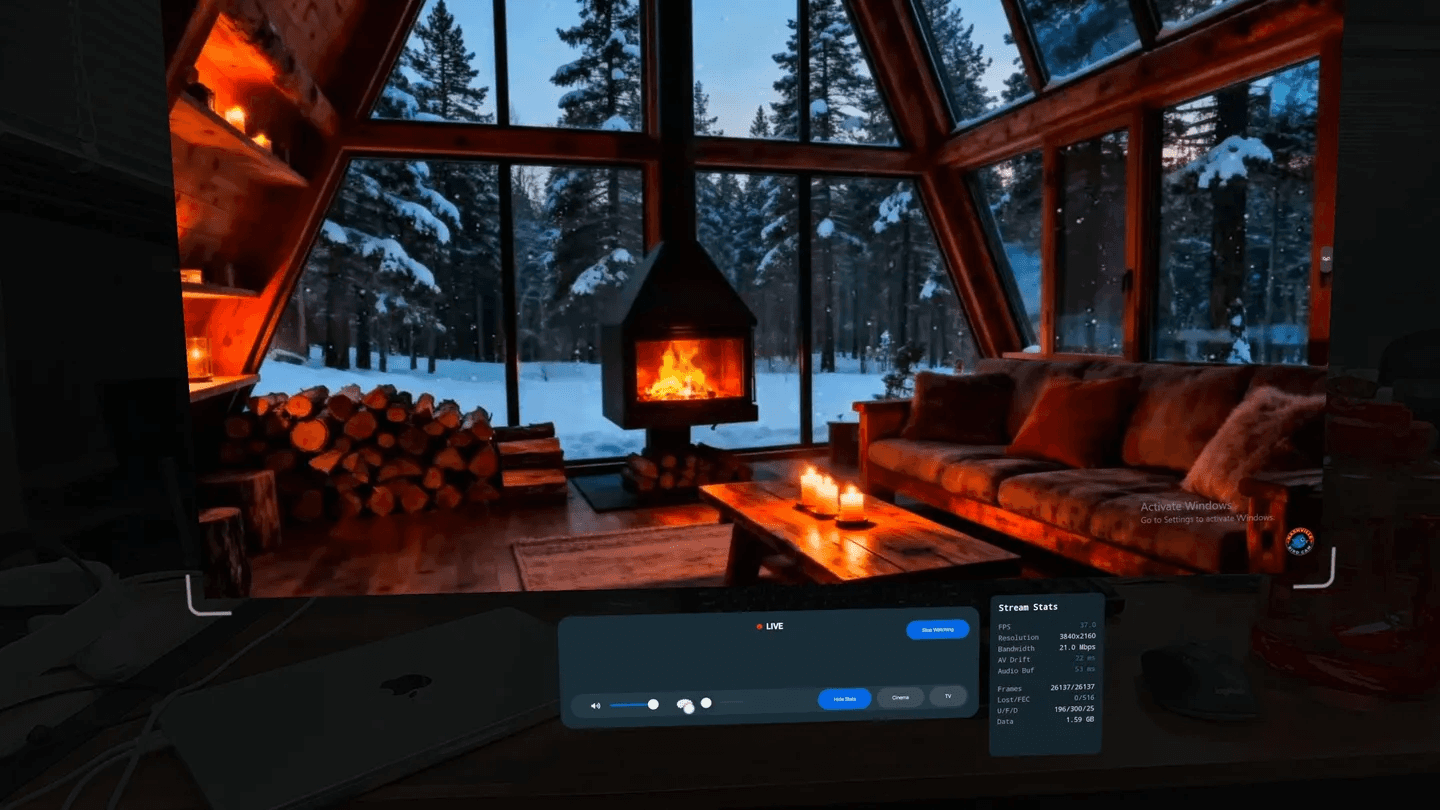
Owl3D is a Windows app that converts any content playing on your PC into 3D in real time. It runs locally — nothing is uploaded anywhere — and streams the 3D output to your Quest via the Owl3D Link app.
What this means in practice: every movie you already have access to — Netflix, YouTube, your local video library — plays in 3D. You don't need to find 3D versions. You don't need to buy anything again. Owl3D converts whatever is on your screen, frame by frame, as you watch.
Setup:
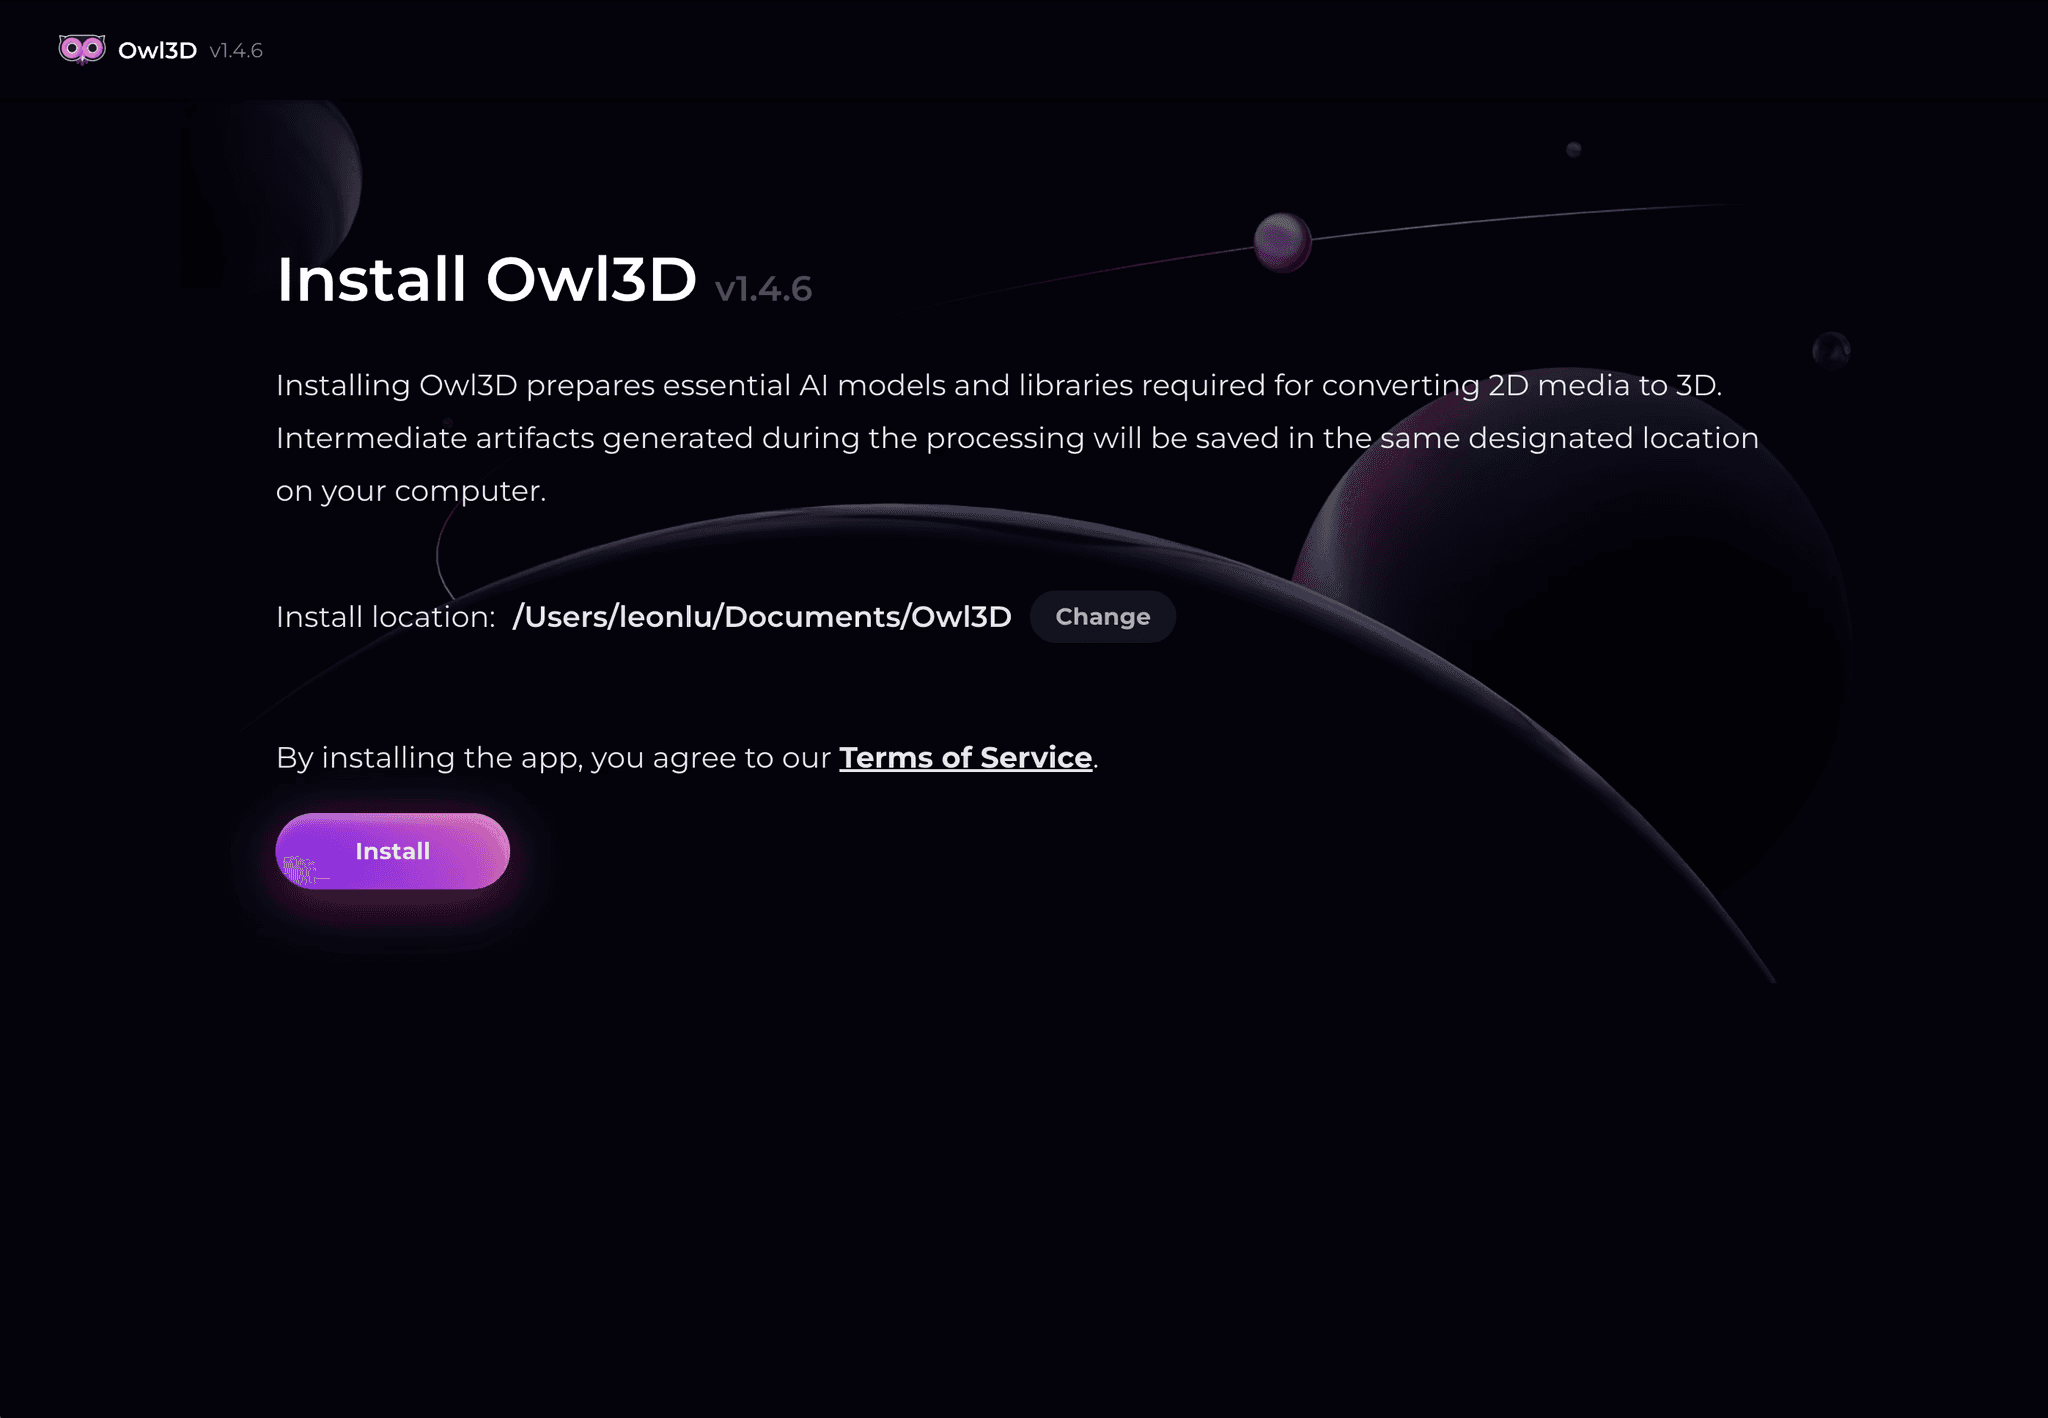
Install Owl3D on your Windows PC
Download here: https://www.owl3d.com/
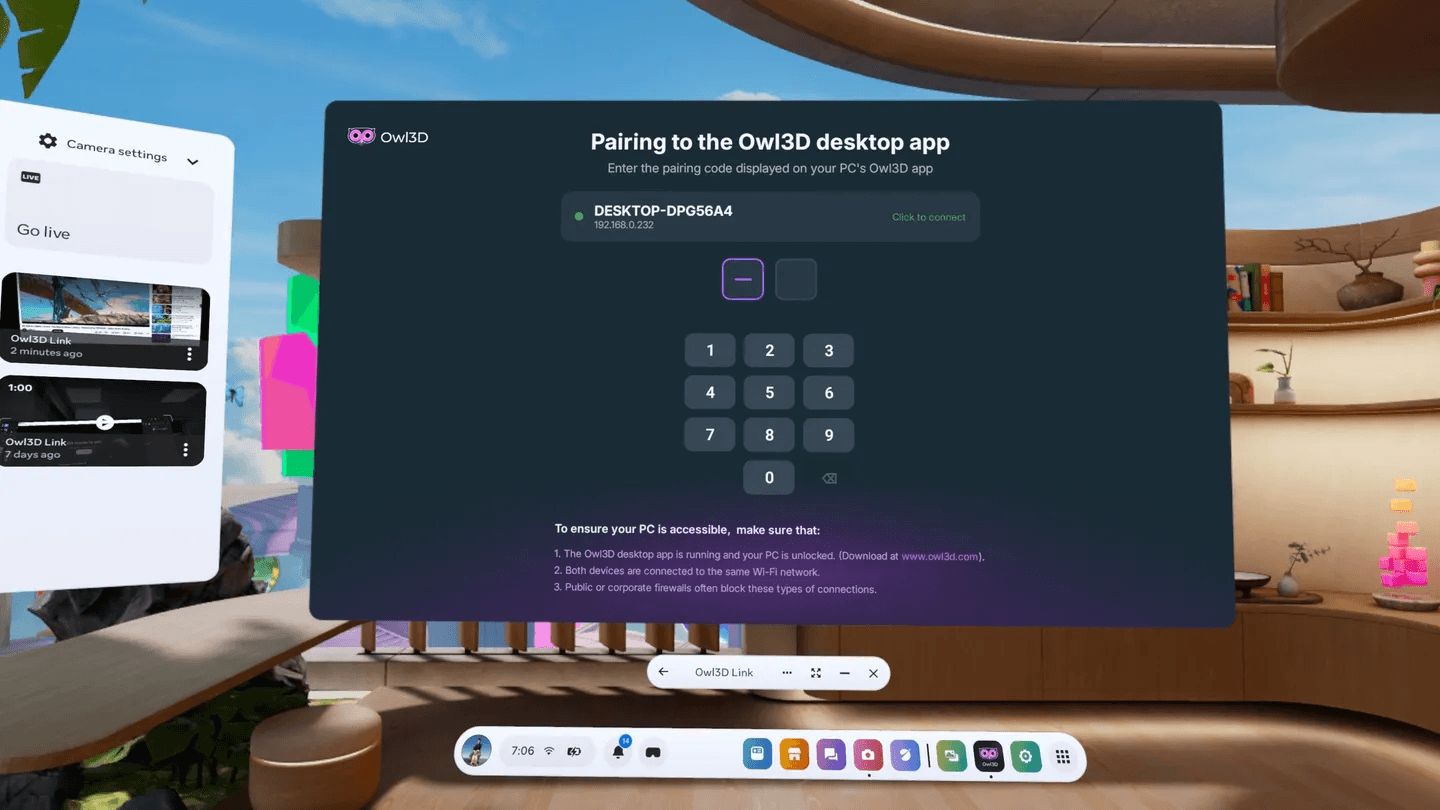
Install Owl3D Link on your Quest (free, from the Meta store)
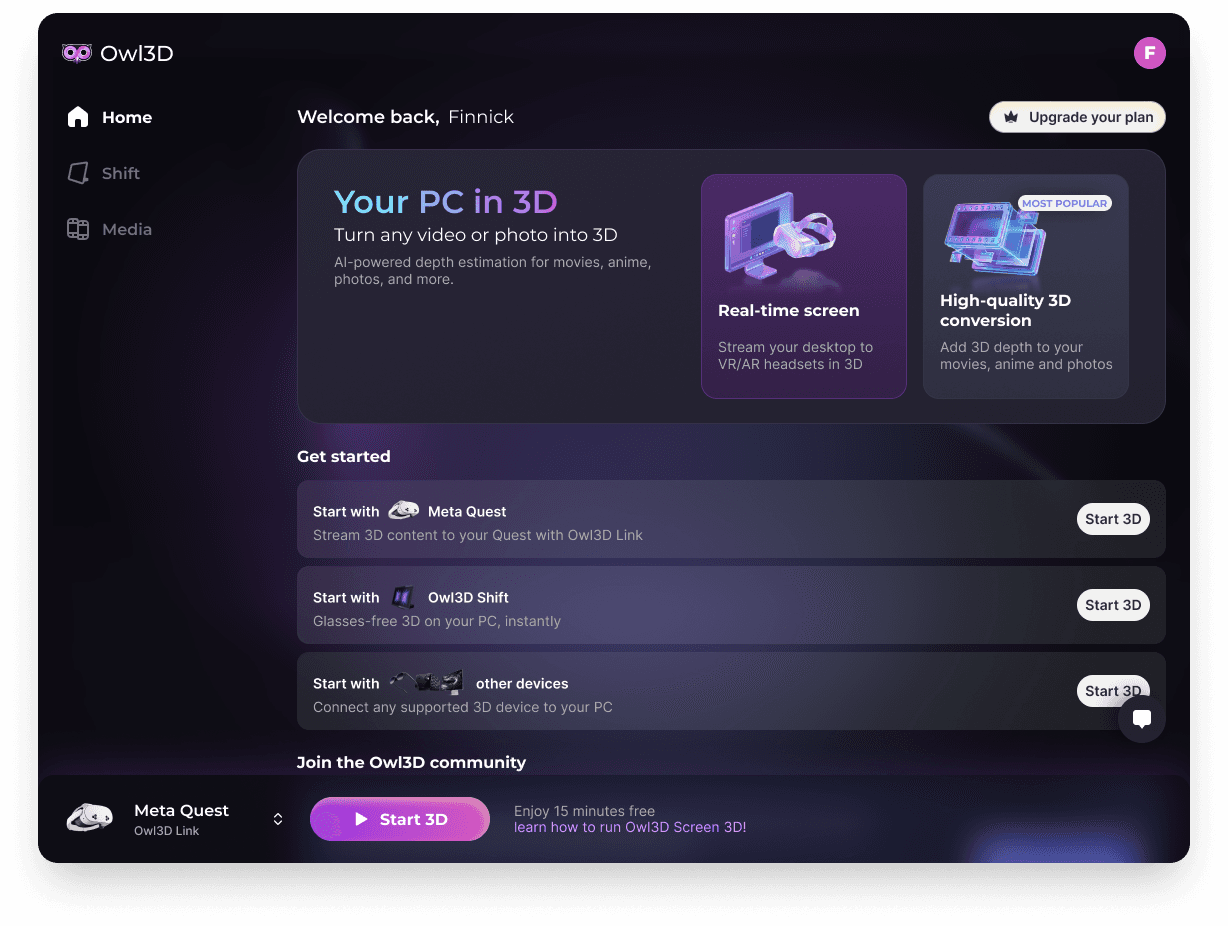
Open Owl3D on your PC, enable Live 3D
Open Owl3D Link on your Quest — your PC screen streams to the headset in 3D
Total time: about 10 minutes.
What to Watch First
A few things that work particularly well with real-time 3D conversion:
Action and nature documentaries — fast movement and depth planes benefit most from 3D. Planet Earth-style content looks significantly different.
Movies you already know well — watching a familiar film in 3D for the first time is a useful calibration. You'll notice exactly where depth changes the experience.
Your own videos and photos — Owl3D's Converter mode processes files frame by frame for higher quality output. Family footage in 3D is a different kind of viewing entirely.
Other Things Worth Setting Up
Beyond movies, a few quick wins for new Quest owners:
Virtual Desktop or Meta's Air Link — for streaming your PC desktop wirelessly to Quest. Useful if you want to browse or work in VR. Owl3D Link handles the 3D streaming specifically.
Adjust the IPD — the interpupillary distance slider on Quest 3 makes a real difference in image sharpness. Match it to your eyes before watching anything.
Enable 120Hz — in Settings > Display, if your content supports it.
The Short Version
Default Quest setup: large 2D floating screen. Functional, underwhelming.
Quest + Owl3D: actual 3D cinema that works with everything you already watch. That's the setup worth building toward first.
Congrats on the new headset. Here's the honest answer most setup guides skip.
Quest's default movie experience is a floating 2D screen. It's larger than your TV, and the privacy is real — but it's still flat. To actually use what the hardware is capable of, you need one more piece.
The Default Setup (and Its Limit)
Out of the box, Quest lets you watch movies through apps like the Meta TV app, YouTube VR, or a web browser. The screen is big. The experience is fine.
But everything you watch this way is 2D. Your brain is wearing a spatial computing device, and the content has no depth. Most people notice this as a vague underwhelm — "it's like a big TV, I guess" — and eventually go back to their couch.
The hardware isn't the problem. The content format is.
The Setup That Actually Works
Owl3D is a Windows app that converts any content playing on your PC into 3D in real time. It runs locally — nothing is uploaded anywhere — and streams the 3D output to your Quest via the Owl3D Link app.
What this means in practice: every movie you already have access to — Netflix, YouTube, your local video library — plays in 3D. You don't need to find 3D versions. You don't need to buy anything again. Owl3D converts whatever is on your screen, frame by frame, as you watch.
Setup:
Install Owl3D on your Windows PC
Download here: https://www.owl3d.com/
Install Owl3D Link on your Quest (free, from the Meta store)
Open Owl3D on your PC, enable Live 3D
Open Owl3D Link on your Quest — your PC screen streams to the headset in 3D
Total time: about 10 minutes.
What to Watch First
A few things that work particularly well with real-time 3D conversion:
Action and nature documentaries — fast movement and depth planes benefit most from 3D. Planet Earth-style content looks significantly different.
Movies you already know well — watching a familiar film in 3D for the first time is a useful calibration. You'll notice exactly where depth changes the experience.
Your own videos and photos — Owl3D's Converter mode processes files frame by frame for higher quality output. Family footage in 3D is a different kind of viewing entirely.
Other Things Worth Setting Up
Beyond movies, a few quick wins for new Quest owners:
Virtual Desktop or Meta's Air Link — for streaming your PC desktop wirelessly to Quest. Useful if you want to browse or work in VR. Owl3D Link handles the 3D streaming specifically.
Adjust the IPD — the interpupillary distance slider on Quest 3 makes a real difference in image sharpness. Match it to your eyes before watching anything.
Enable 120Hz — in Settings > Display, if your content supports it.
The Short Version
Default Quest setup: large 2D floating screen. Functional, underwhelming.
Quest + Owl3D: actual 3D cinema that works with everything you already watch. That's the setup worth building toward first.


