Tutorial
Tutorial
How to Connect Your VR Headset for Owl3D Screen
How to Connect Your VR Headset for Owl3D Screen
|
6
min read

Hey there, Owl3D users!
Welcome to our guide. To experience the streaming magic of Owl3D Screen, you need to wirelessly connect your VR headset (like a Meta Quest) to your PC.
For the most stable and seamless experience, the Owl3D team strongly recommends using one of two fantastic applications to achieve this: Virtual Desktop or Bigscreen.
This guide will walk you step-by-step through setting them up to get your VR gear ready.
Your Pre-Flight Checklist (This is Crucial!)
A smooth streaming experience depends on the following conditions.
Please ensure you have them:
A Capable PC: Your computer needs sufficient specs to run 3D applications and stream them.
A Standalone VR Headset: E.g., Meta Quest 2/3/Pro, Pico 4, etc.
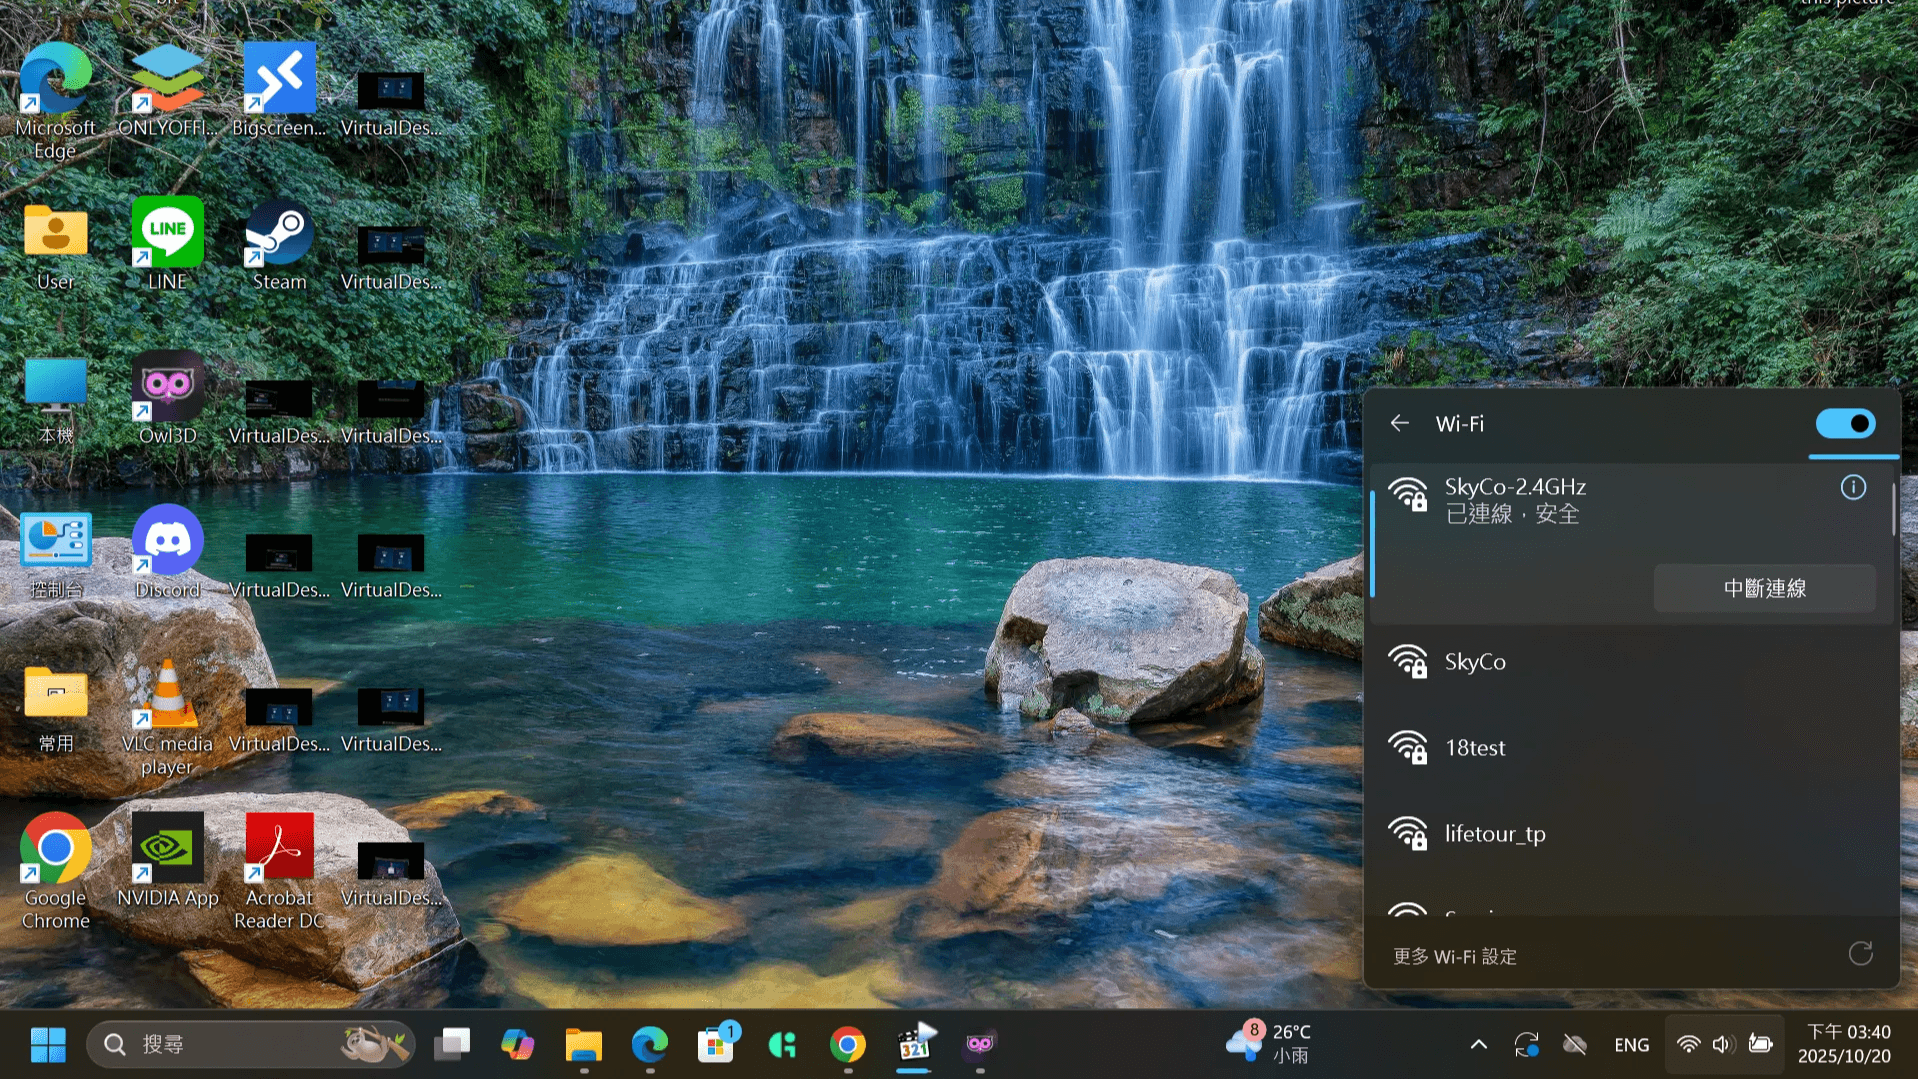
A Great Network Environment:
Connect your PC directly to your router with an Ethernet cable, and ensure your VR headset is connected to the 5GHz or 6GHz (Wi-Fi 6/6E) band of the very same network.
Recommended Option 1: How to Set Up Virtual Desktop (VD)
Virtual Desktop is one of our recommended solutions, well-known for its reliable streaming quality.
Step 1: The PC Setup (Computer Side)
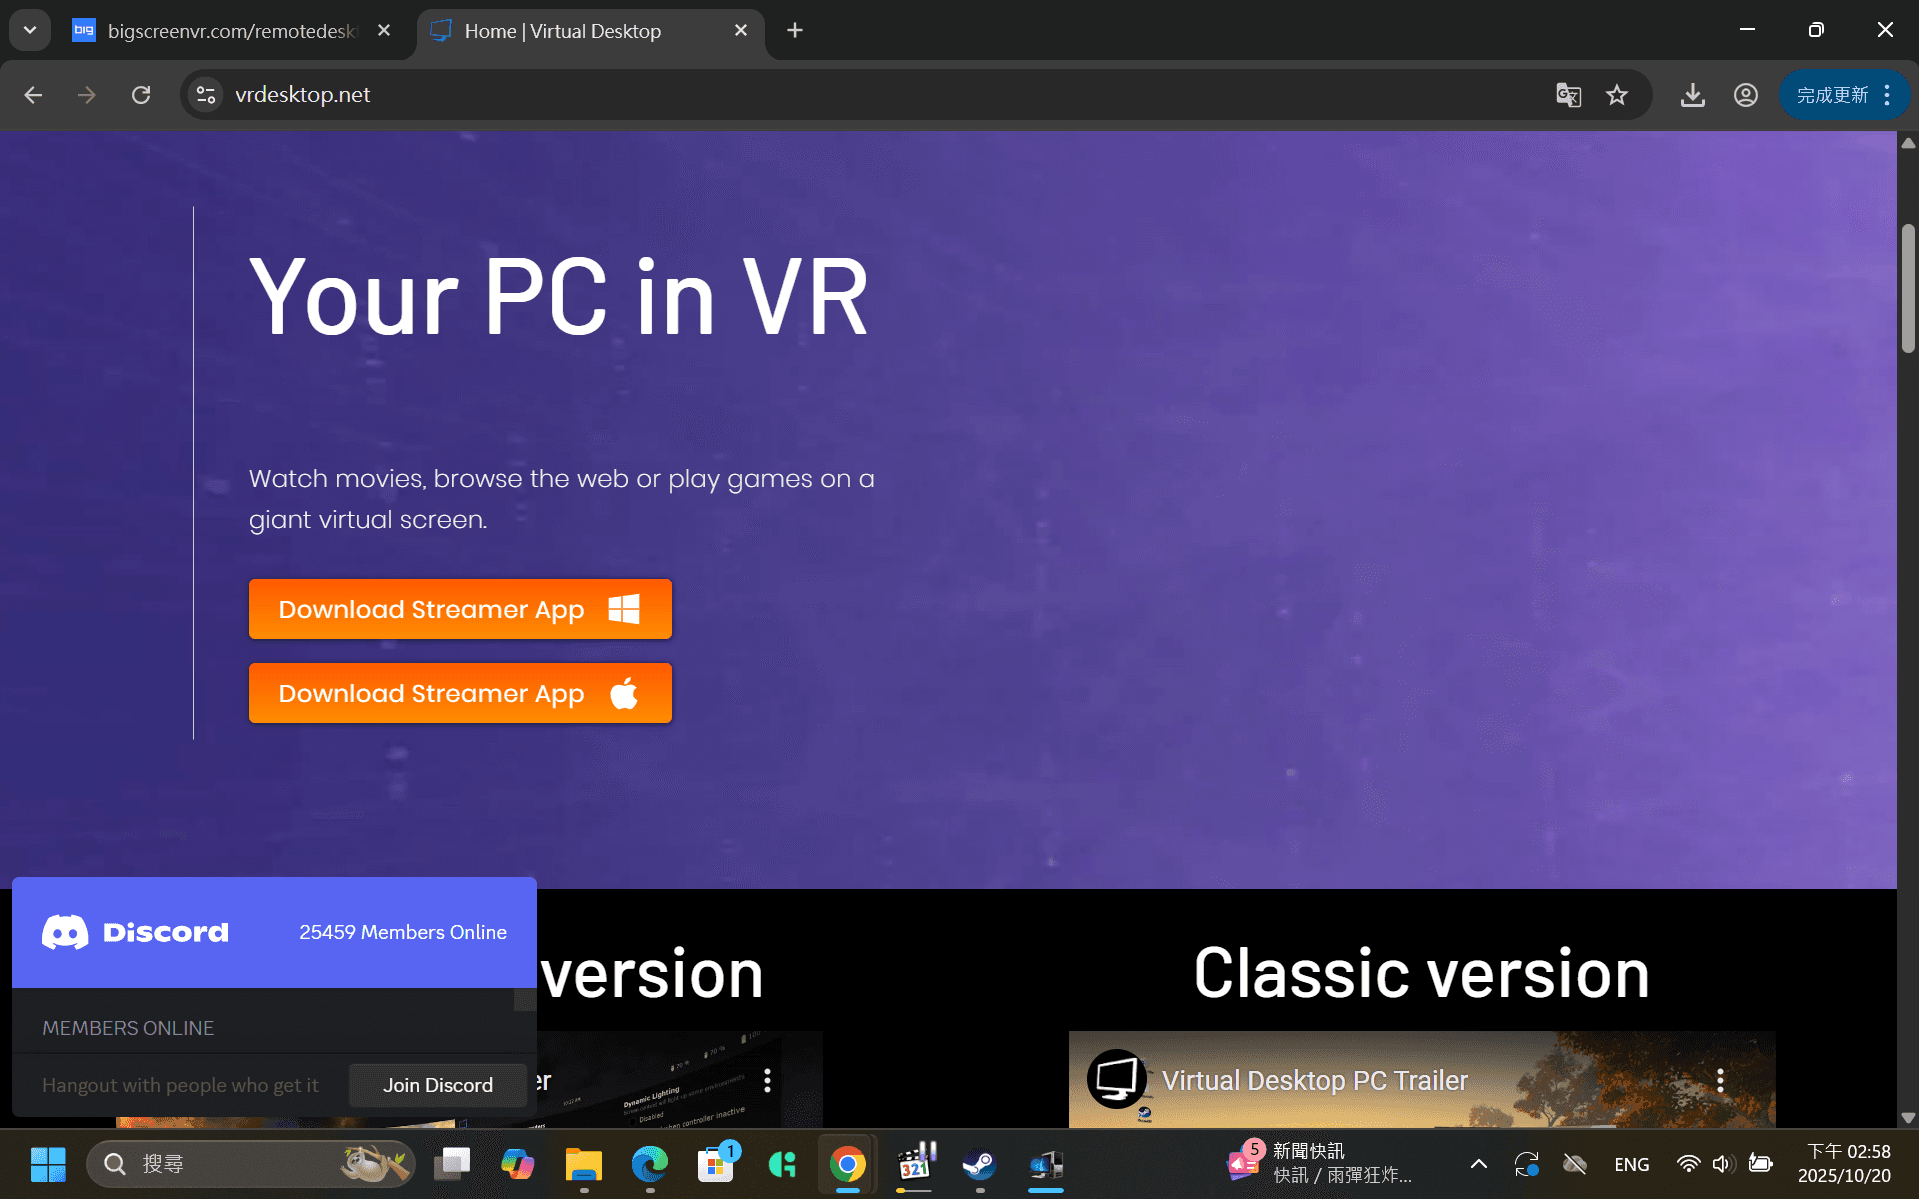
Go to the Website: Browse to https://www.vrdesktop.net, and download the free App.
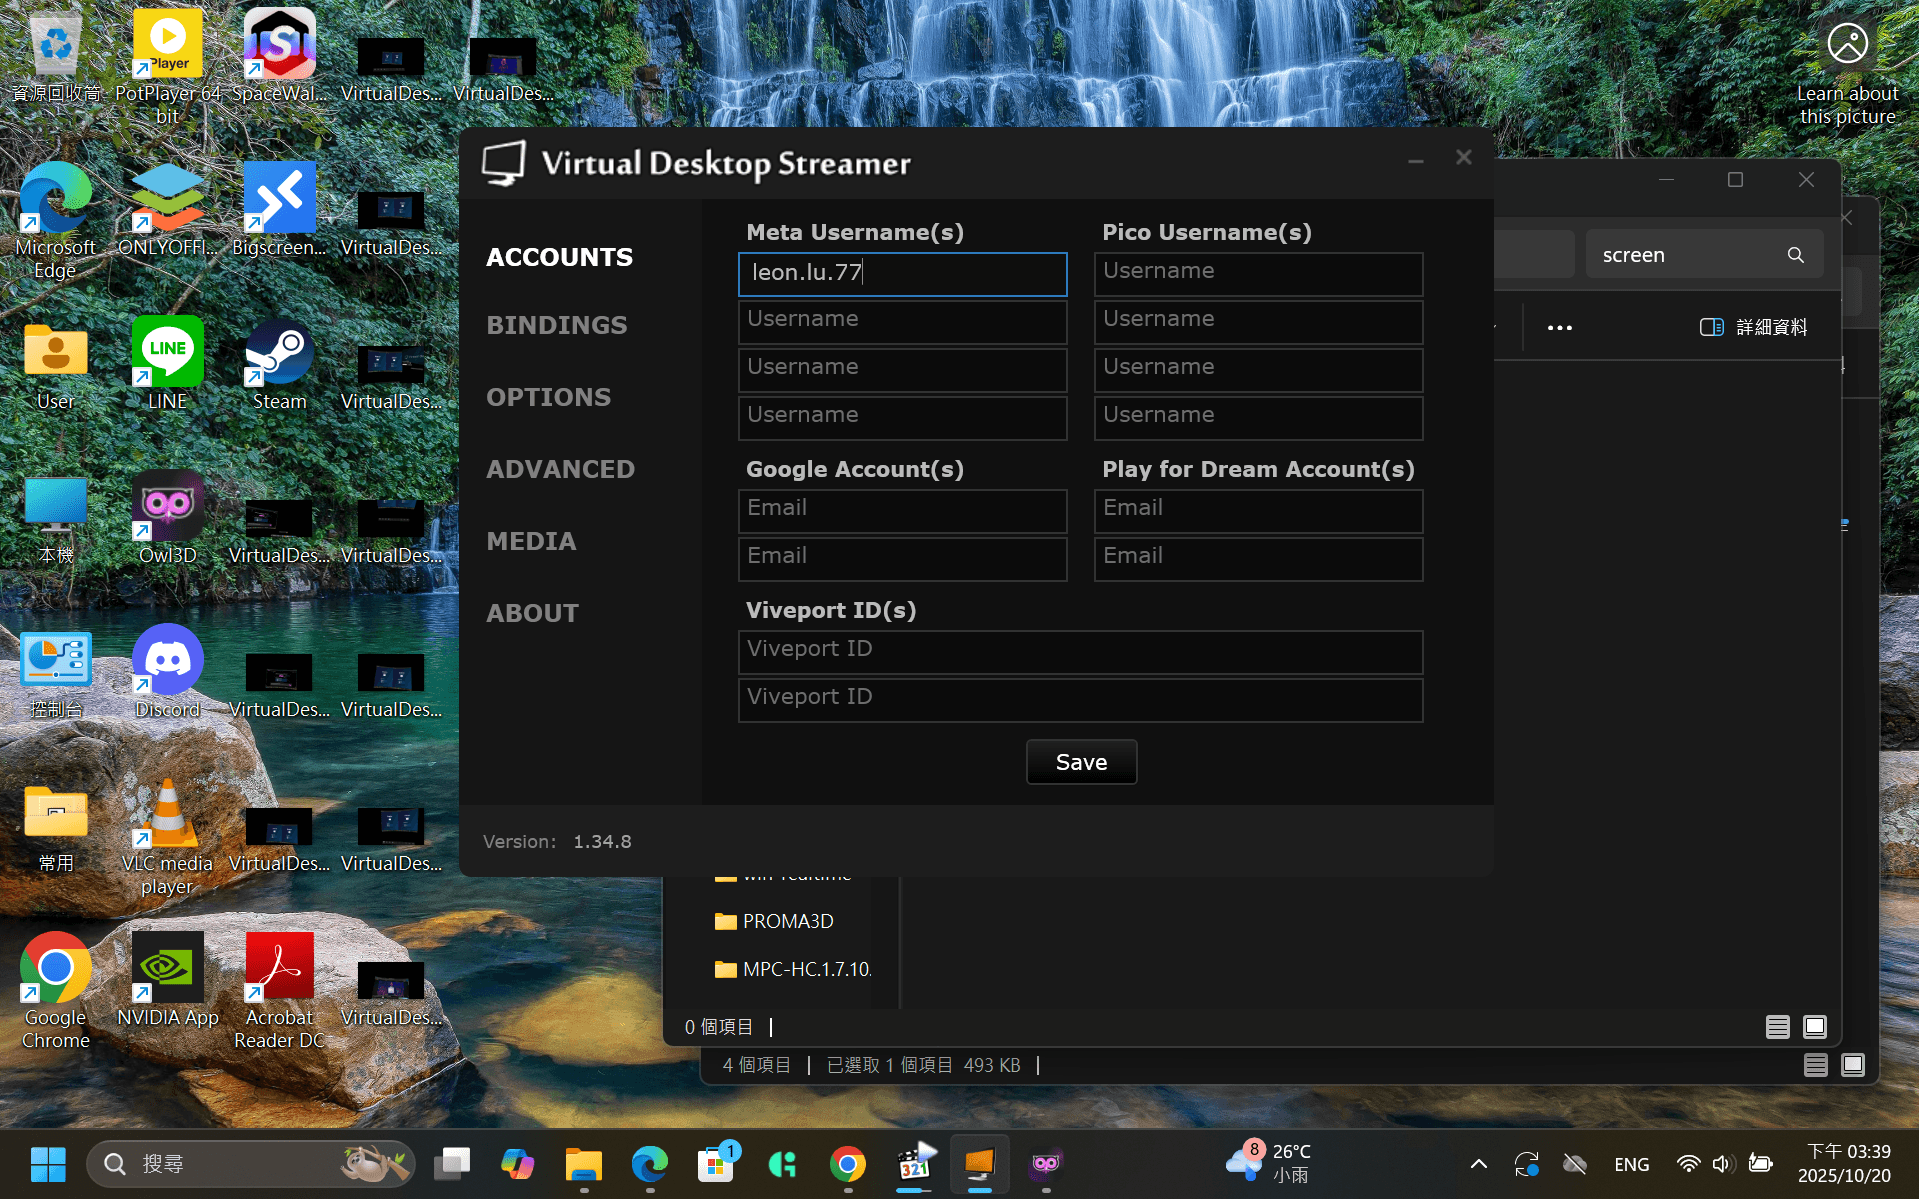
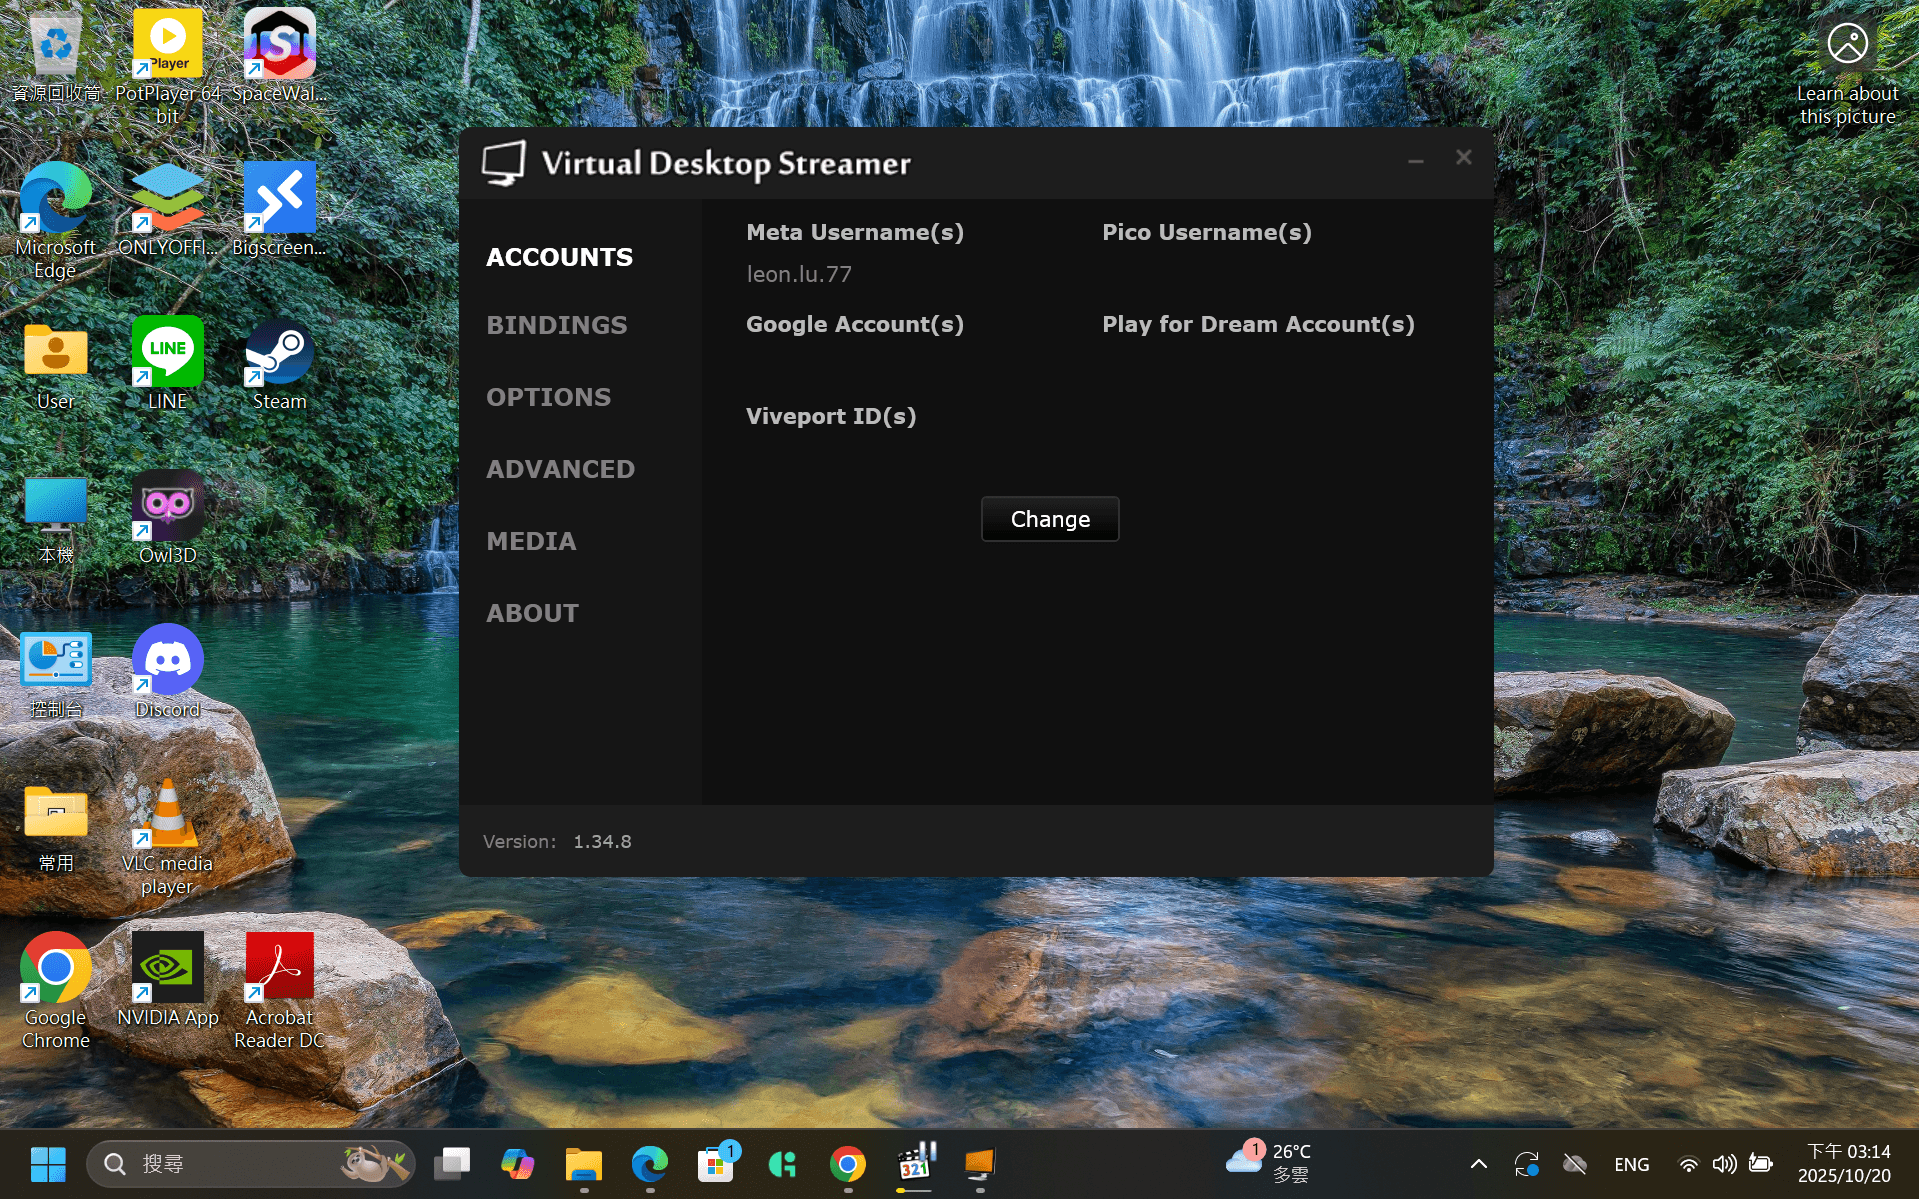
Set Your Name: Launch the Virtual Desktop app. In the "Accounts" tab, enter your exact VR platform username (e.g., your Meta/Oculus username).
Let it Run: Keep the Streamer app running in the background.
Step 2: The VR Setup (Headset Side)
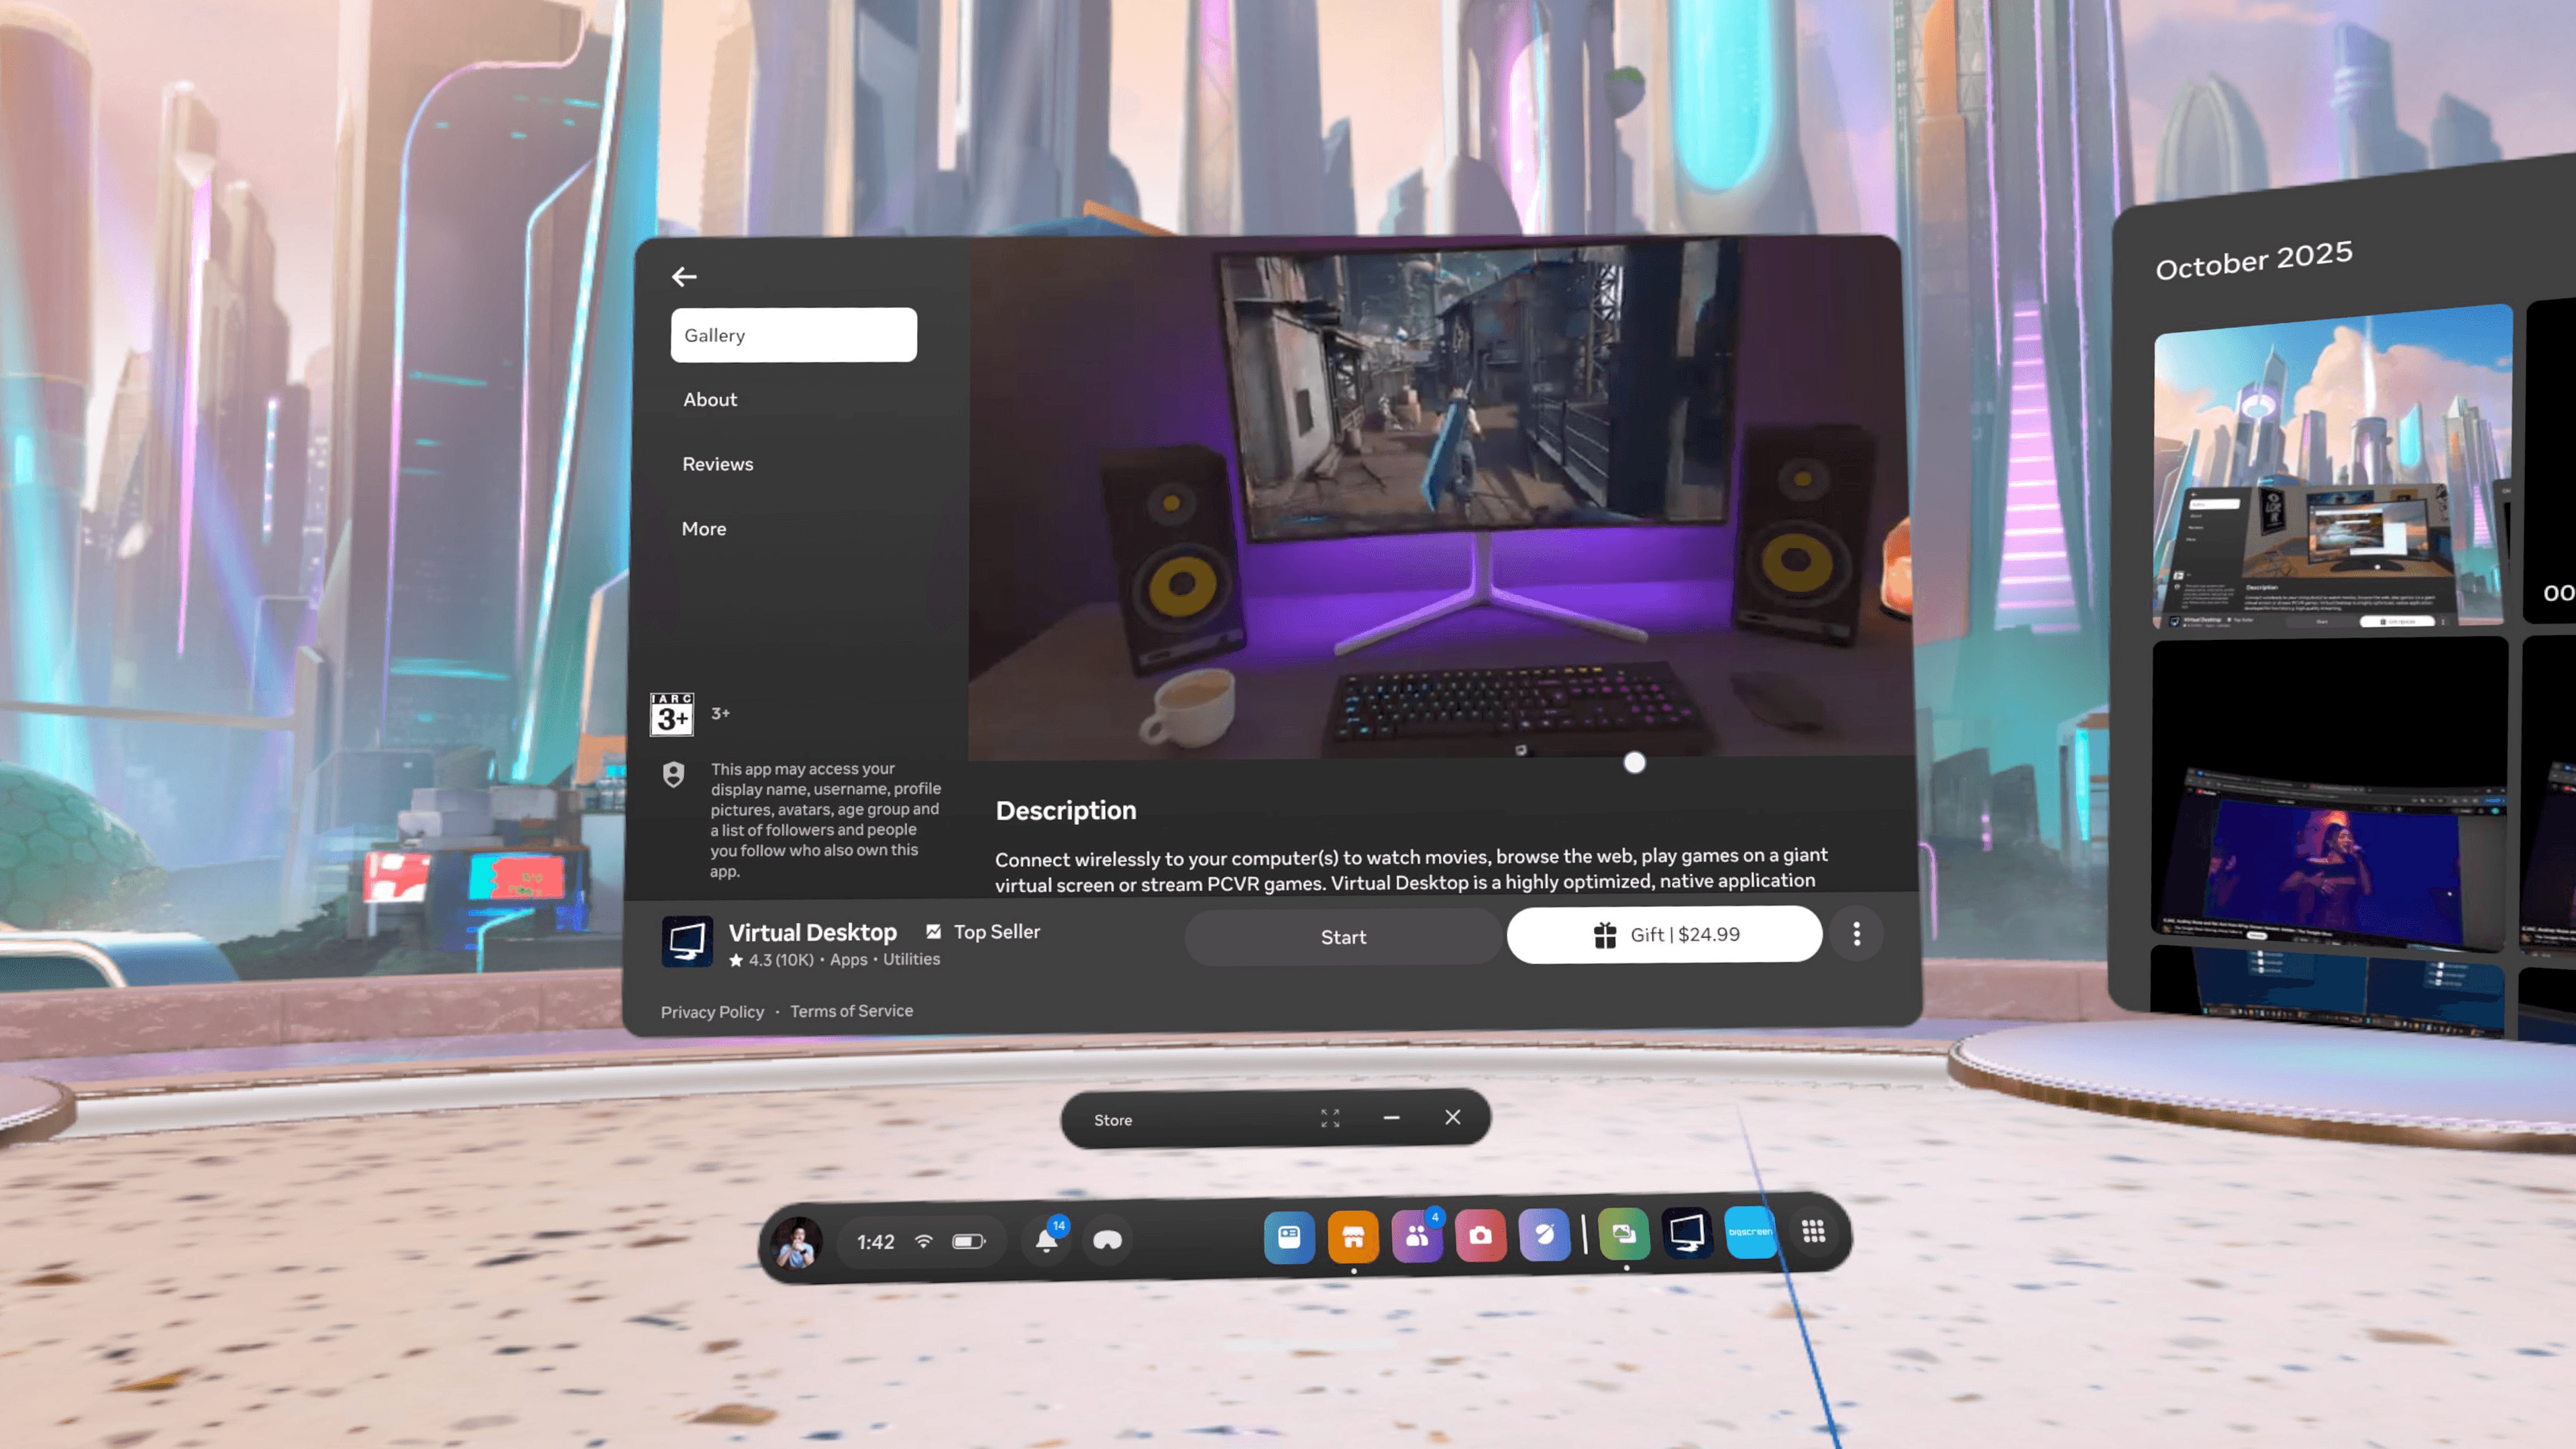
Purchase the App: Go to your VR headset's store (e.g., Quest Store). Search for, purchase, and download the "Virtual Desktop" application.
Launch and Connect: Put on your headset and open Virtual Desktop.
Find Your PC: In the "Computers" list, you should see the PC name you just set up.
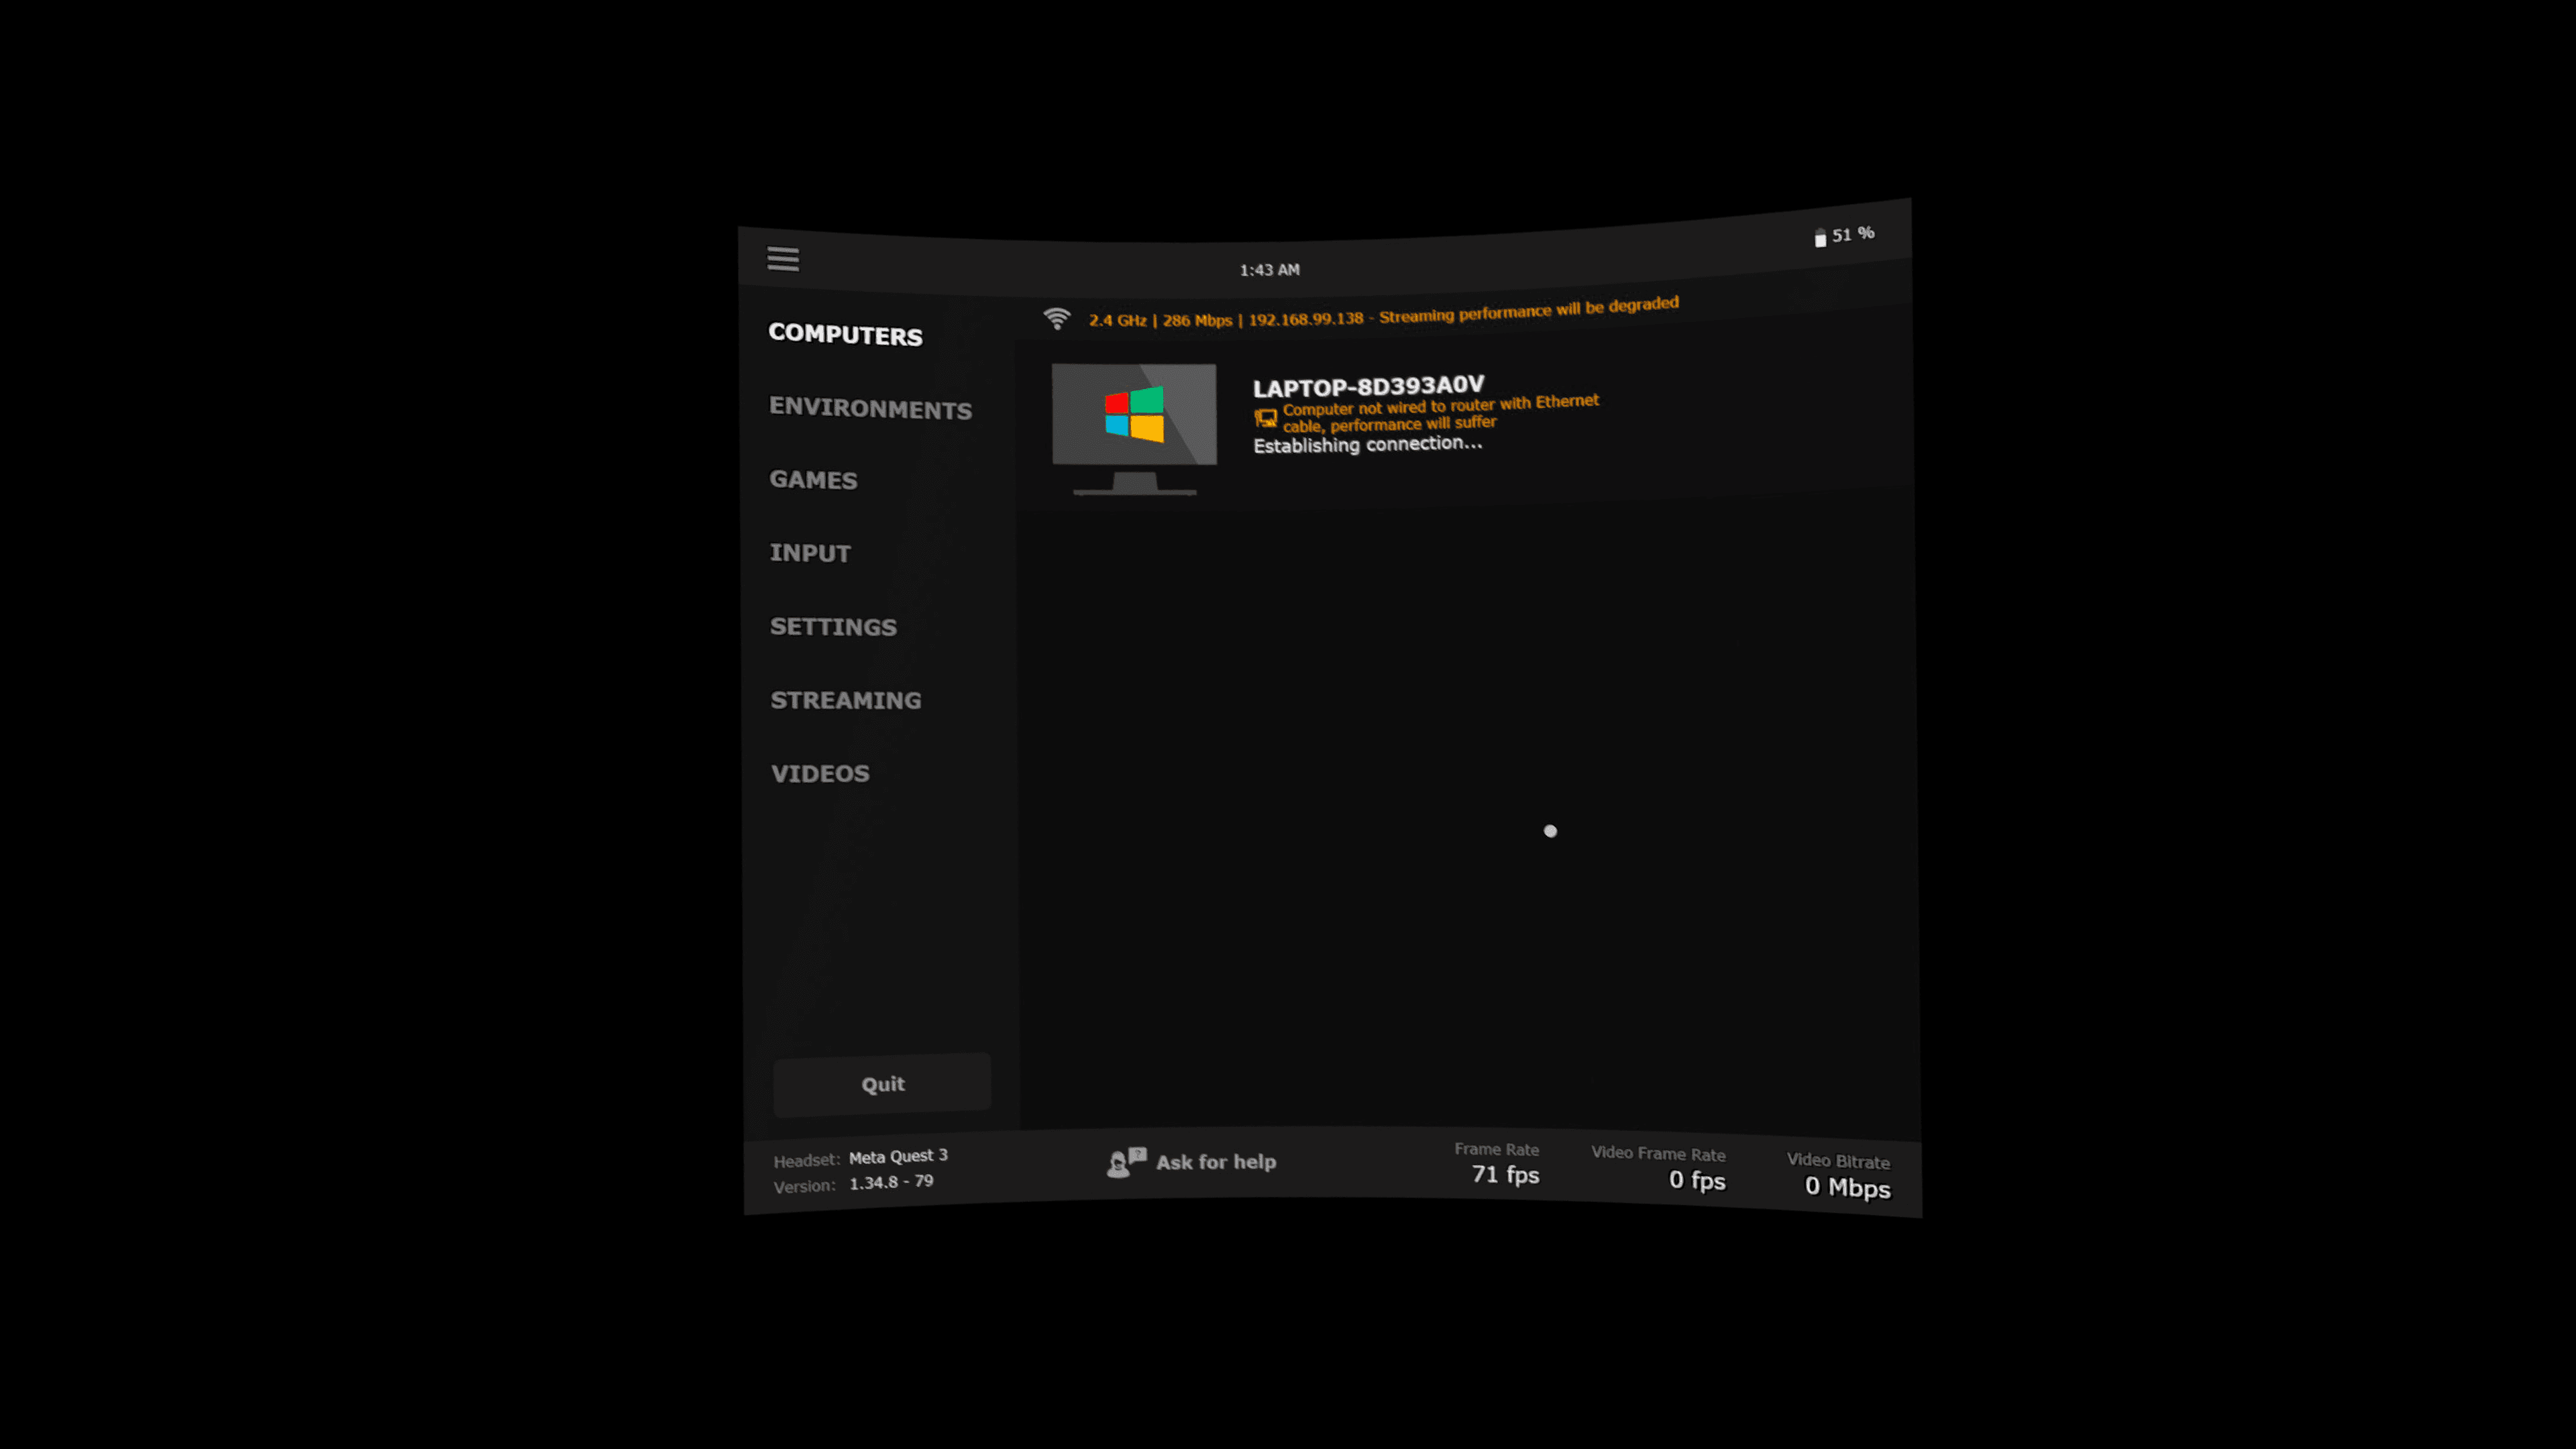
Auto-Connecting to your PC: Your desktop will automatically stream to your VR headset when ready.
Recommended Option 2: How to Set Up Bigscreen
Bigscreen is another excellent tool we recommend, which also provides stable streaming of your desktop to VR.
Step 1: The PC Setup (Computer Side)
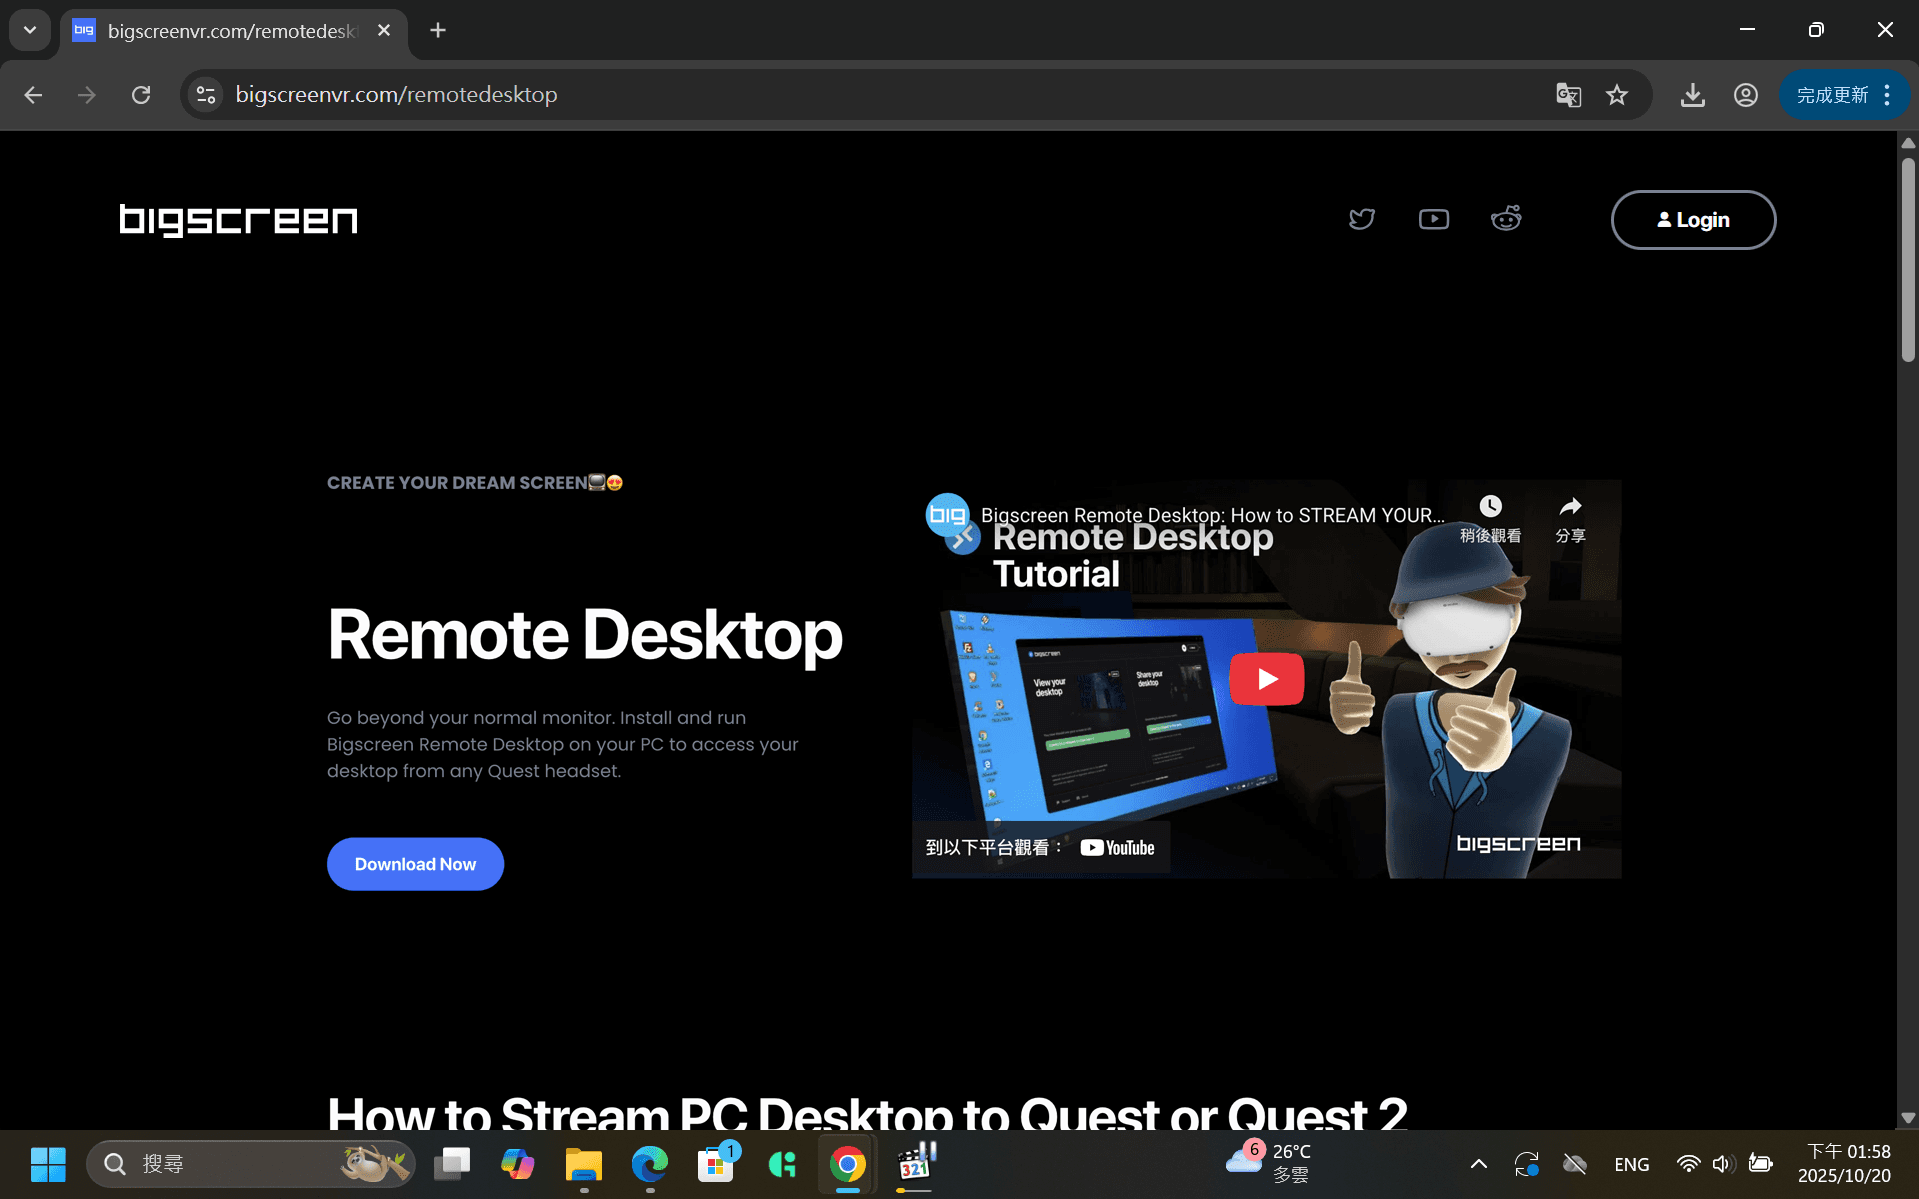
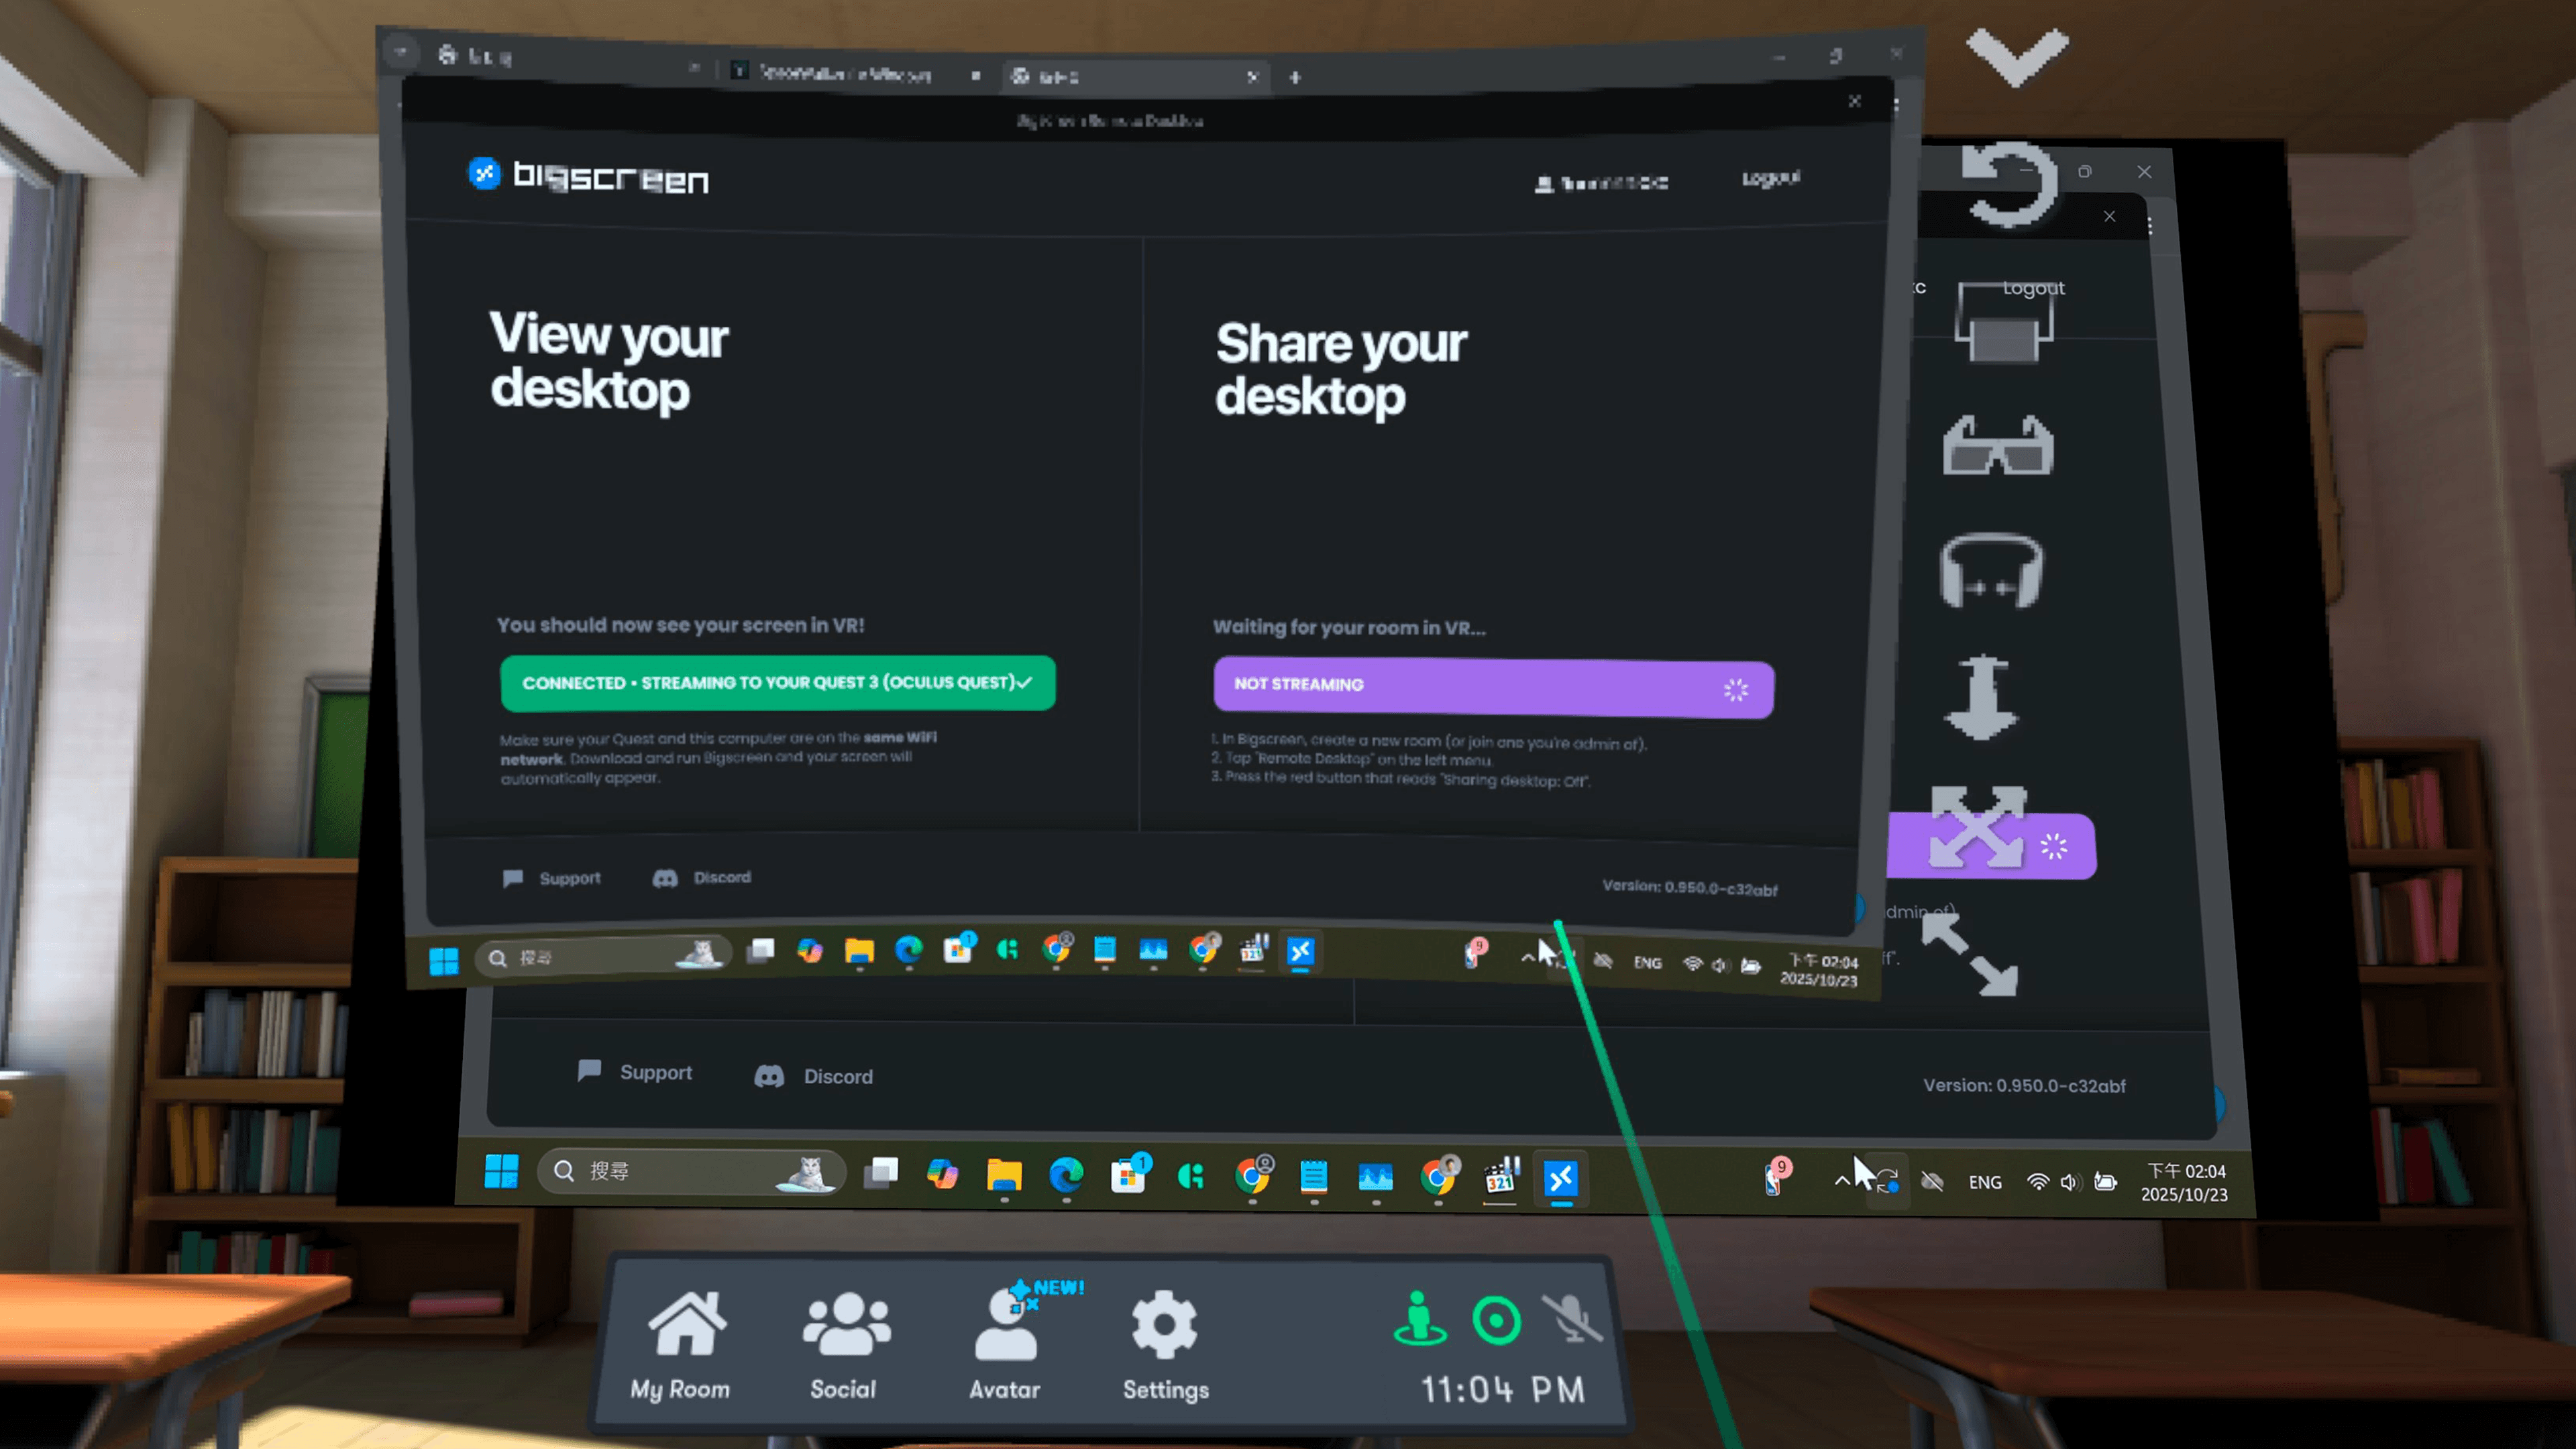
Go to the Website and download: Browse to https://www.bigscreenvr.com, and download the "Bigscreen Remote Desktop" application.
Launch and Stream: Install and run it.
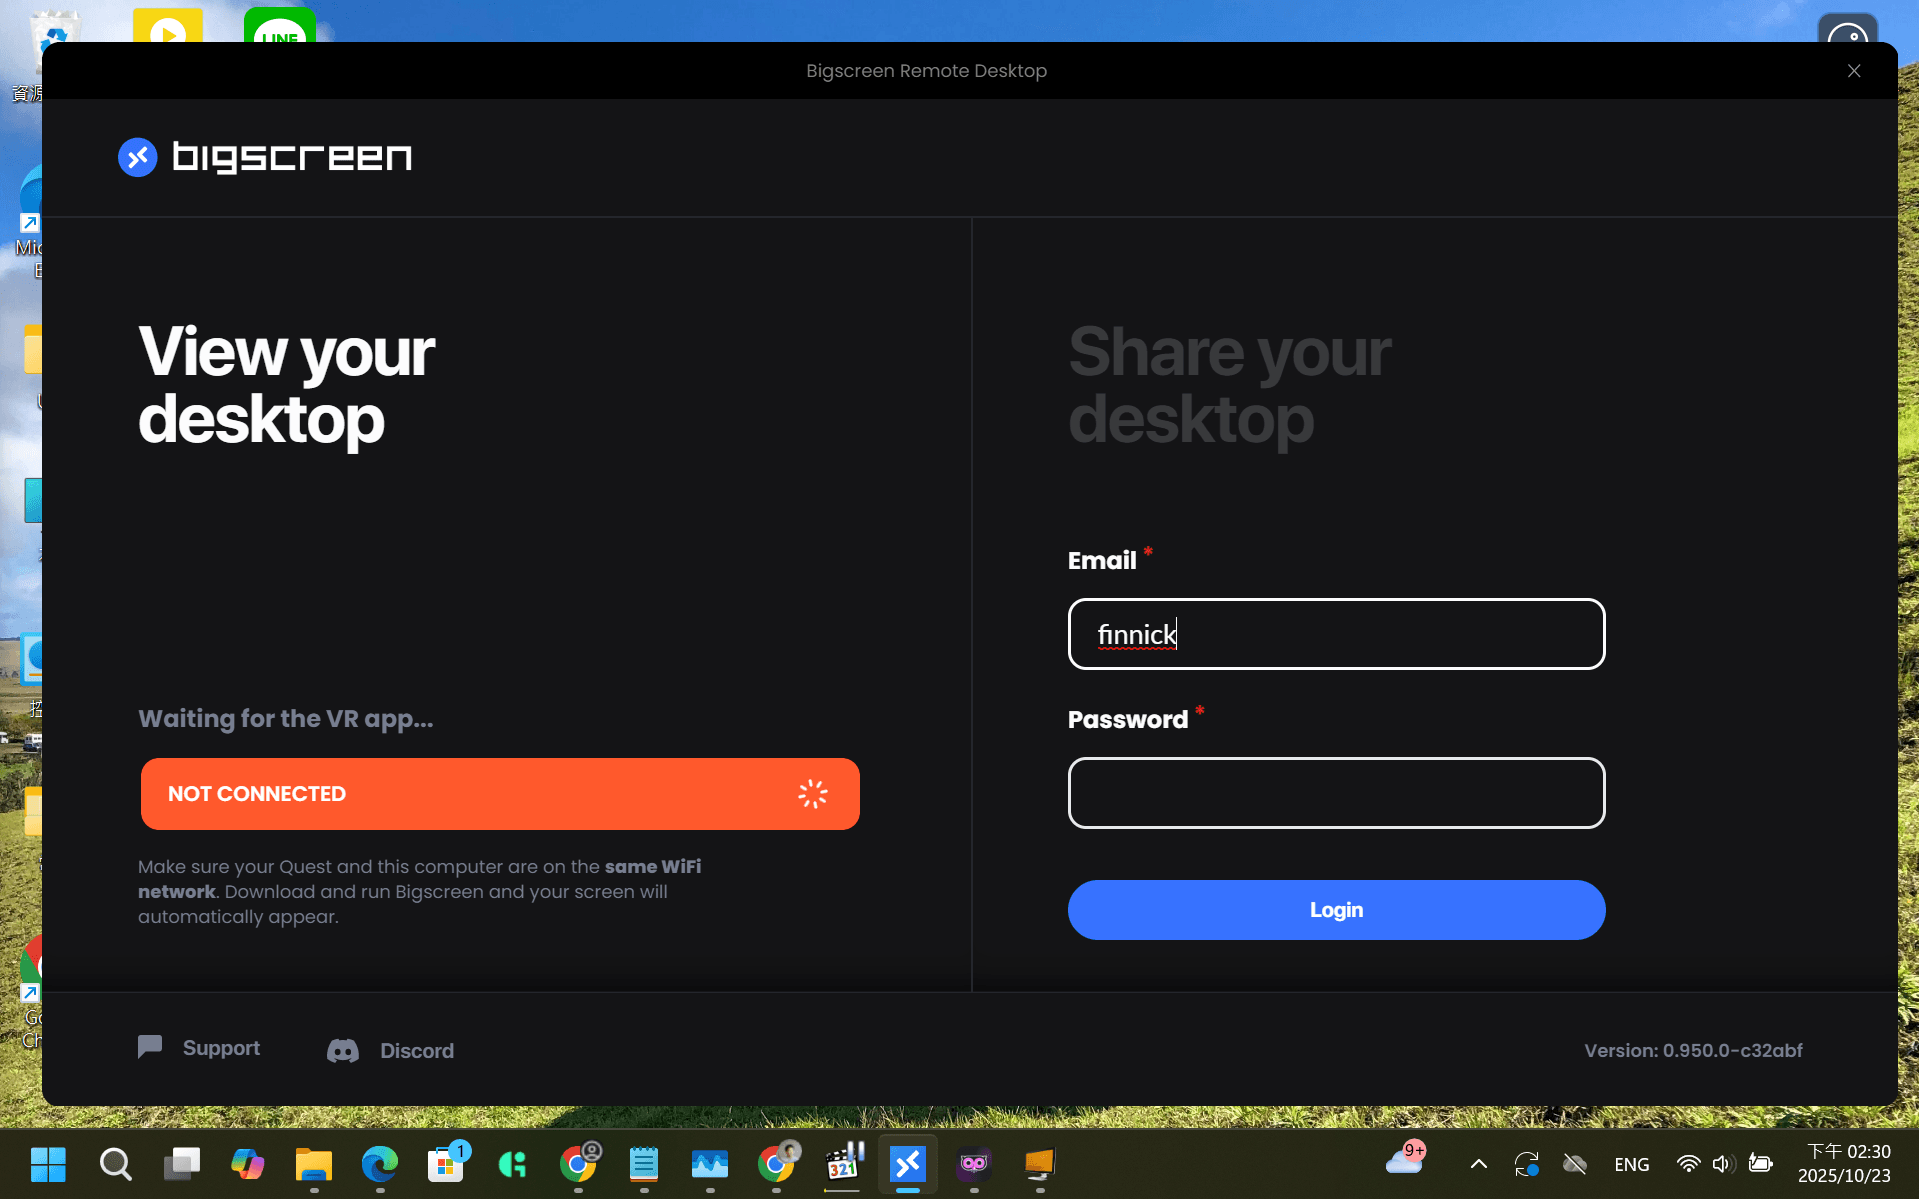
Log in to your account: Open the Bigscreen app on your computer and type in your ID.
Tip: Check that your VR headset and computer share the same Wi-Fi connection.
Step 2: The VR Setup (Headset Side)
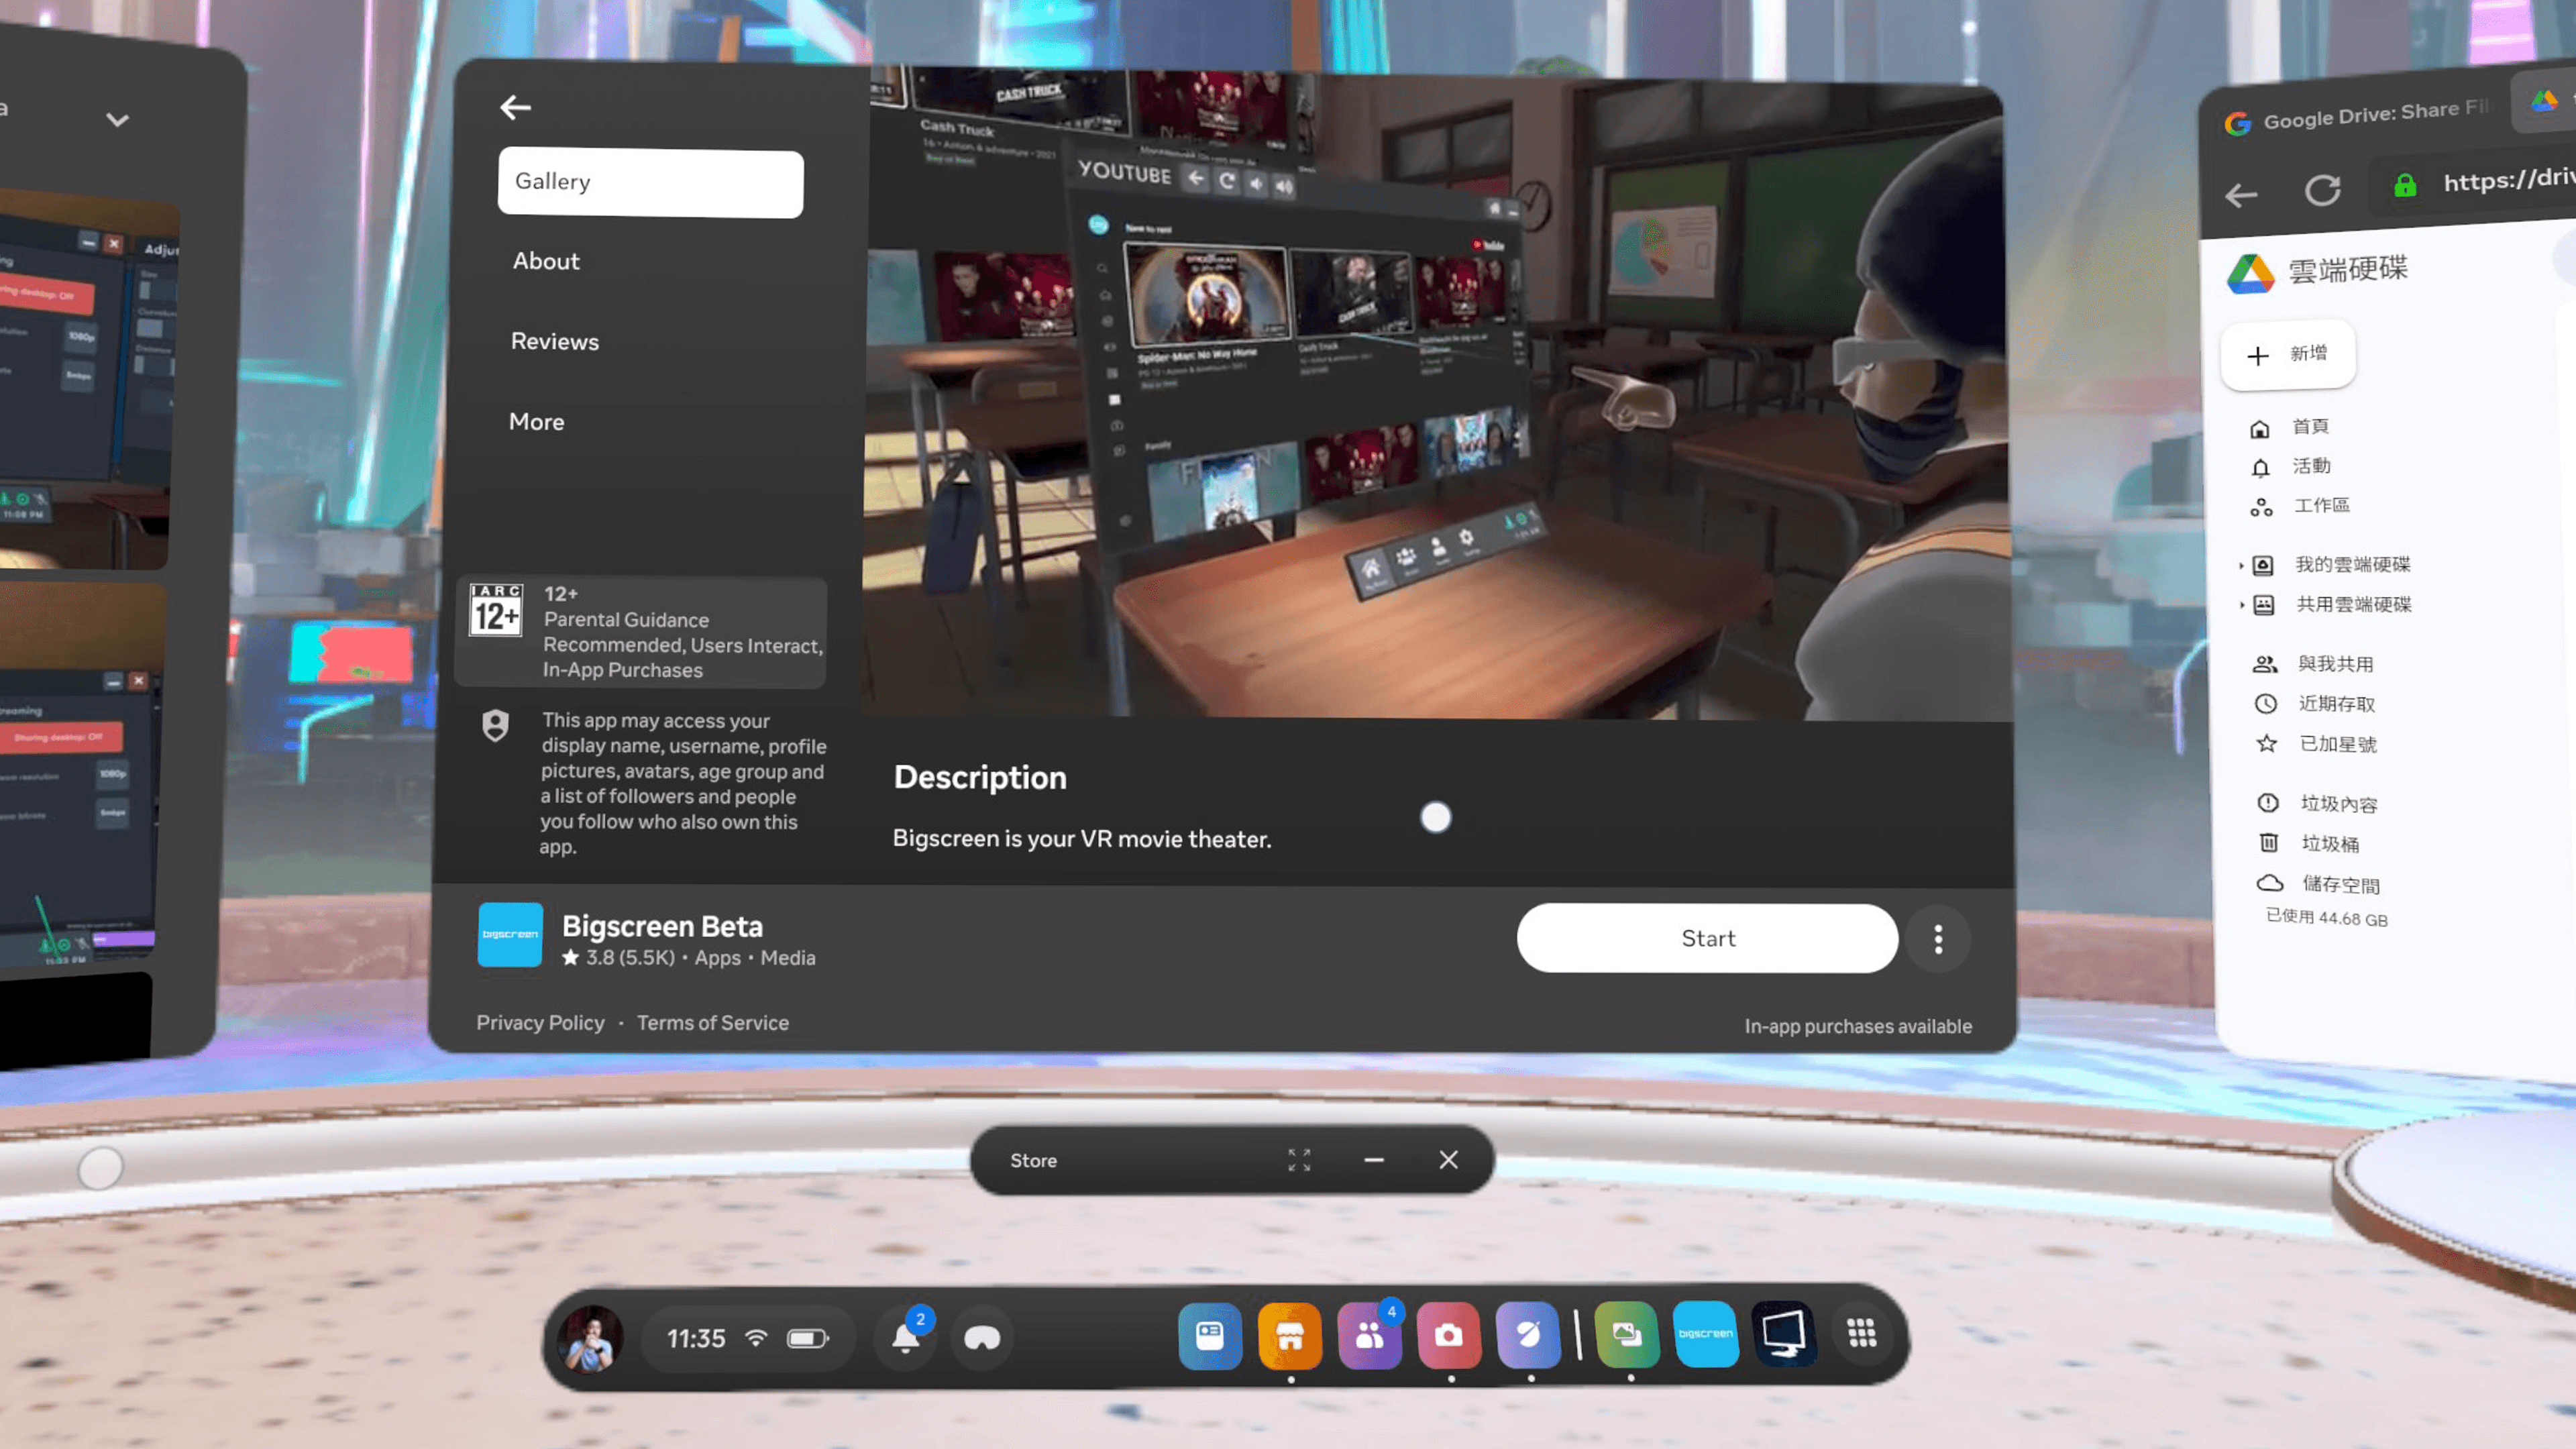
Download the App: On your VR store, search for and download "Bigscreen" (it's free).
Enter your account: Put on your headset, open the Bigscreen app, and log in to your account.

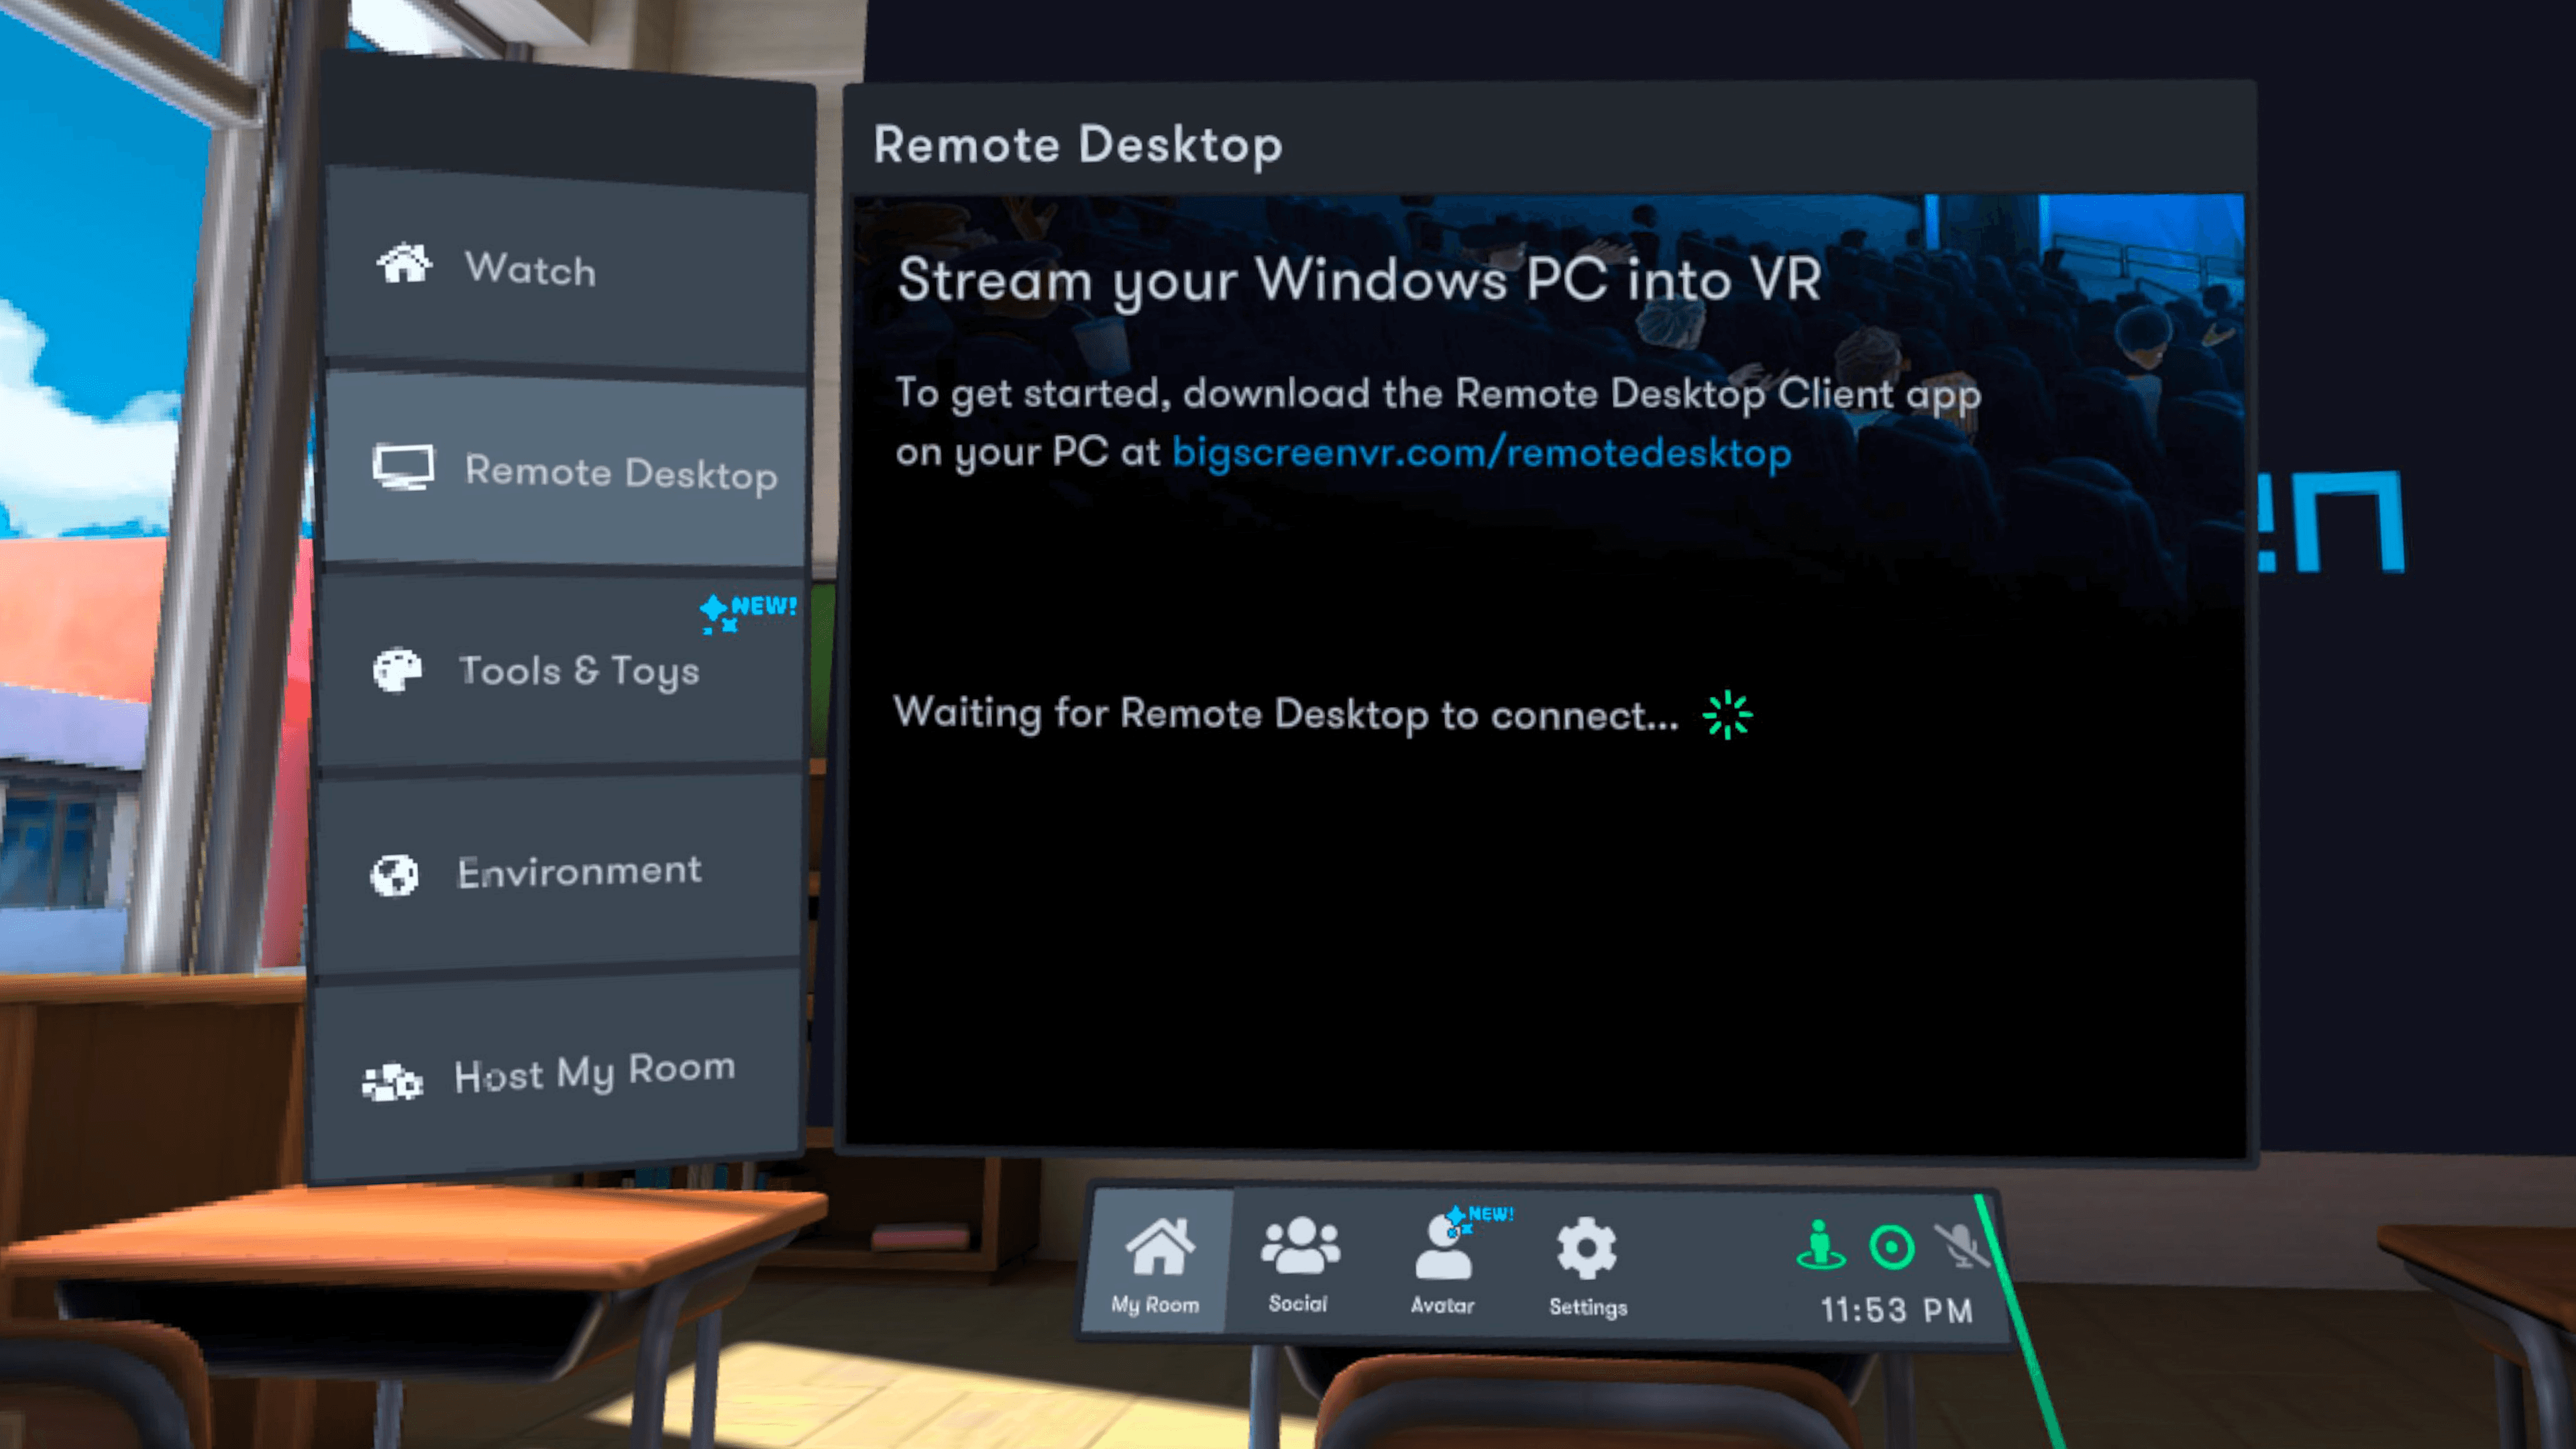
Find Remote Desktop: Open the Bigscreen menu. Look under "My Room" and find "Remote Desktop."
Connection Successful: Your PC desktop will now appear on the virtual screen in Bigscreen.
Ready to Launch Owl3D Screen!
You're all set! Whether you chose Virtual Desktop or Bigscreen, please follow this exact order:
Connect and Launch Owl3D:
Make sure you are wearing your headset and that the Virtual Desktop or Bigscreen connection is active (you should see your PC desktop inside VR).
Return to your PC (you can do this via the virtual desktop in VR) and open your Owl3D Screen project. Click the "Start" button.
Switch to 3D (Half SBS) Mode:
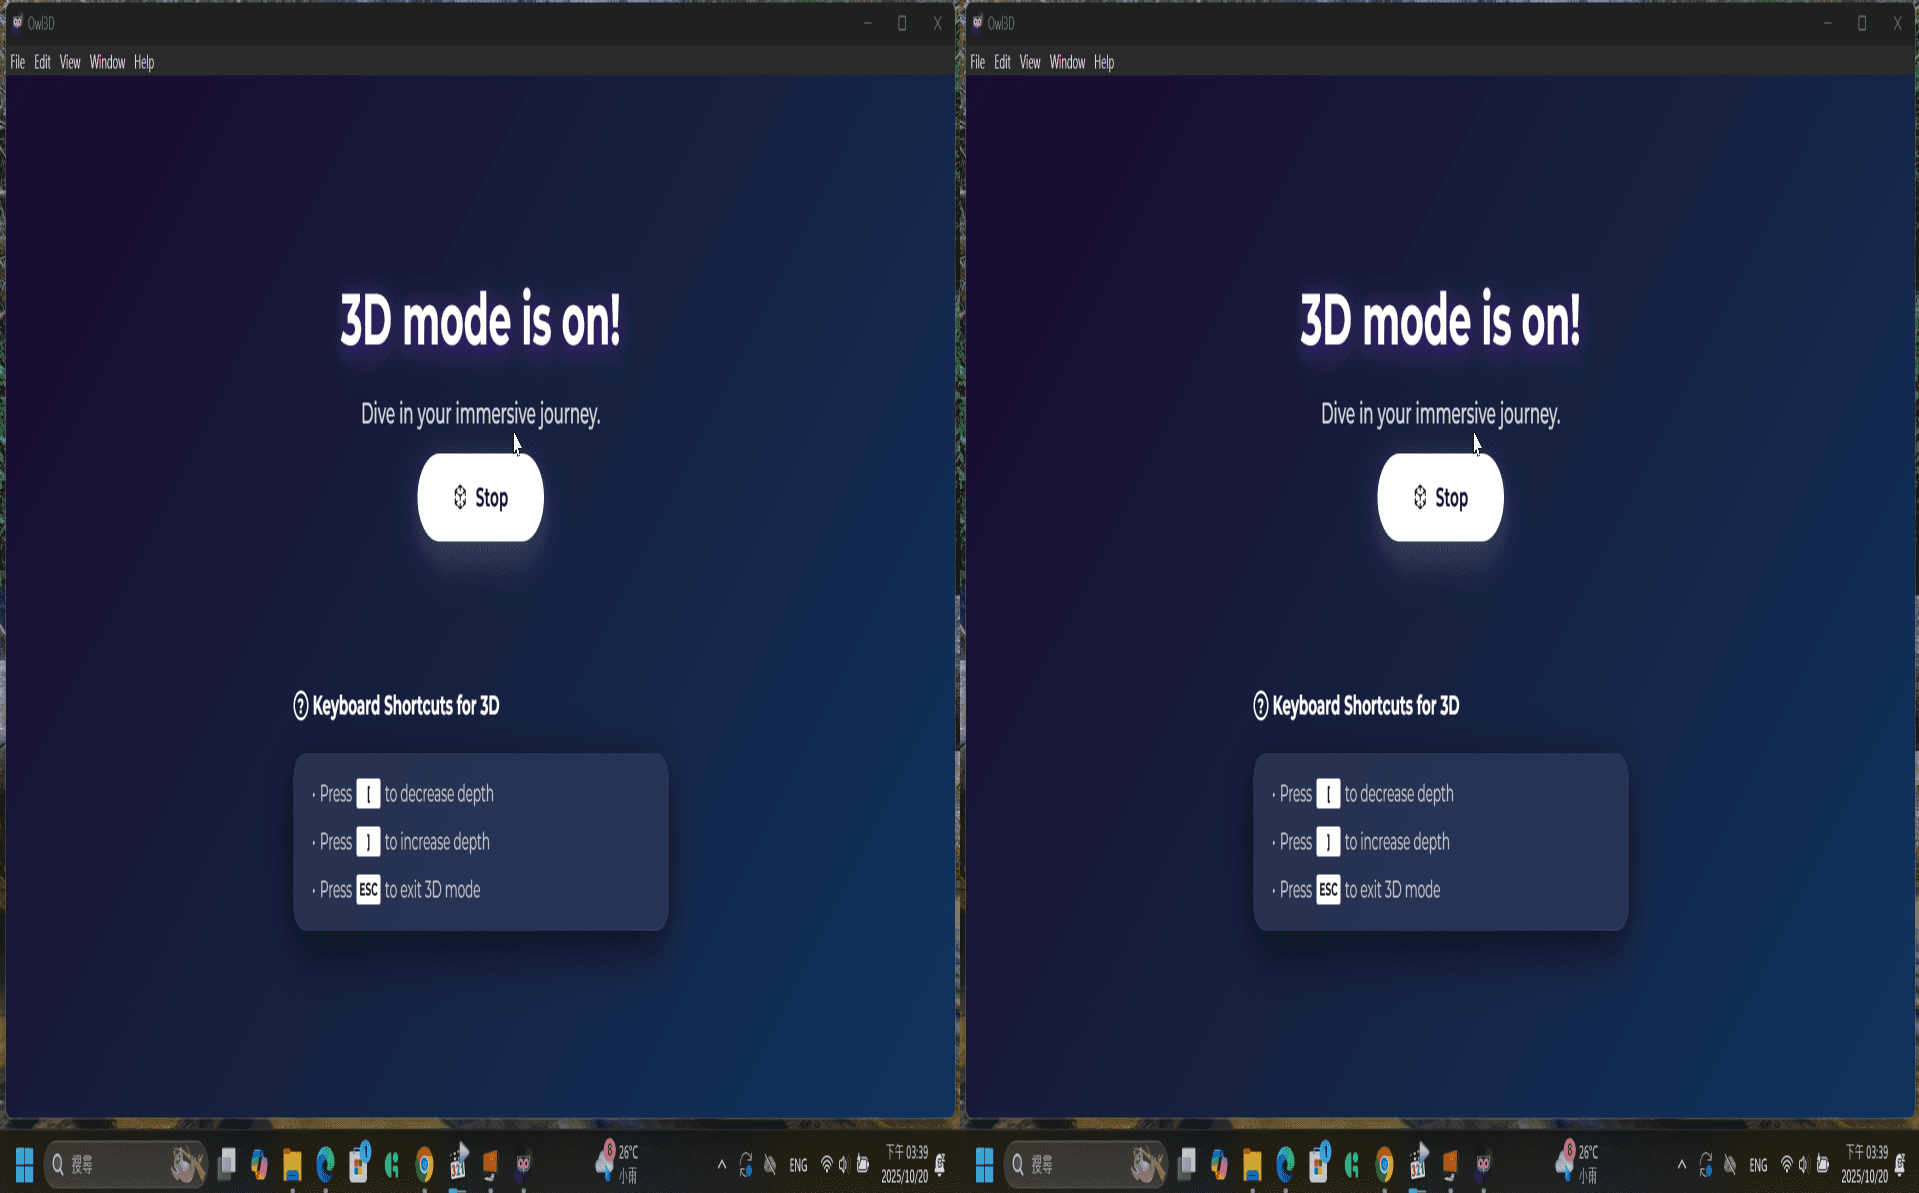
Once Owl3D Screen starts, you will notice your PC screen inside VR splits into two side-by-side images. This will look distorted or doubled. This is normal!
You must now manually enable 3D viewing mode in your VR application:
If you are using Virtual Desktop :
Open the Virtual Desktop menu.
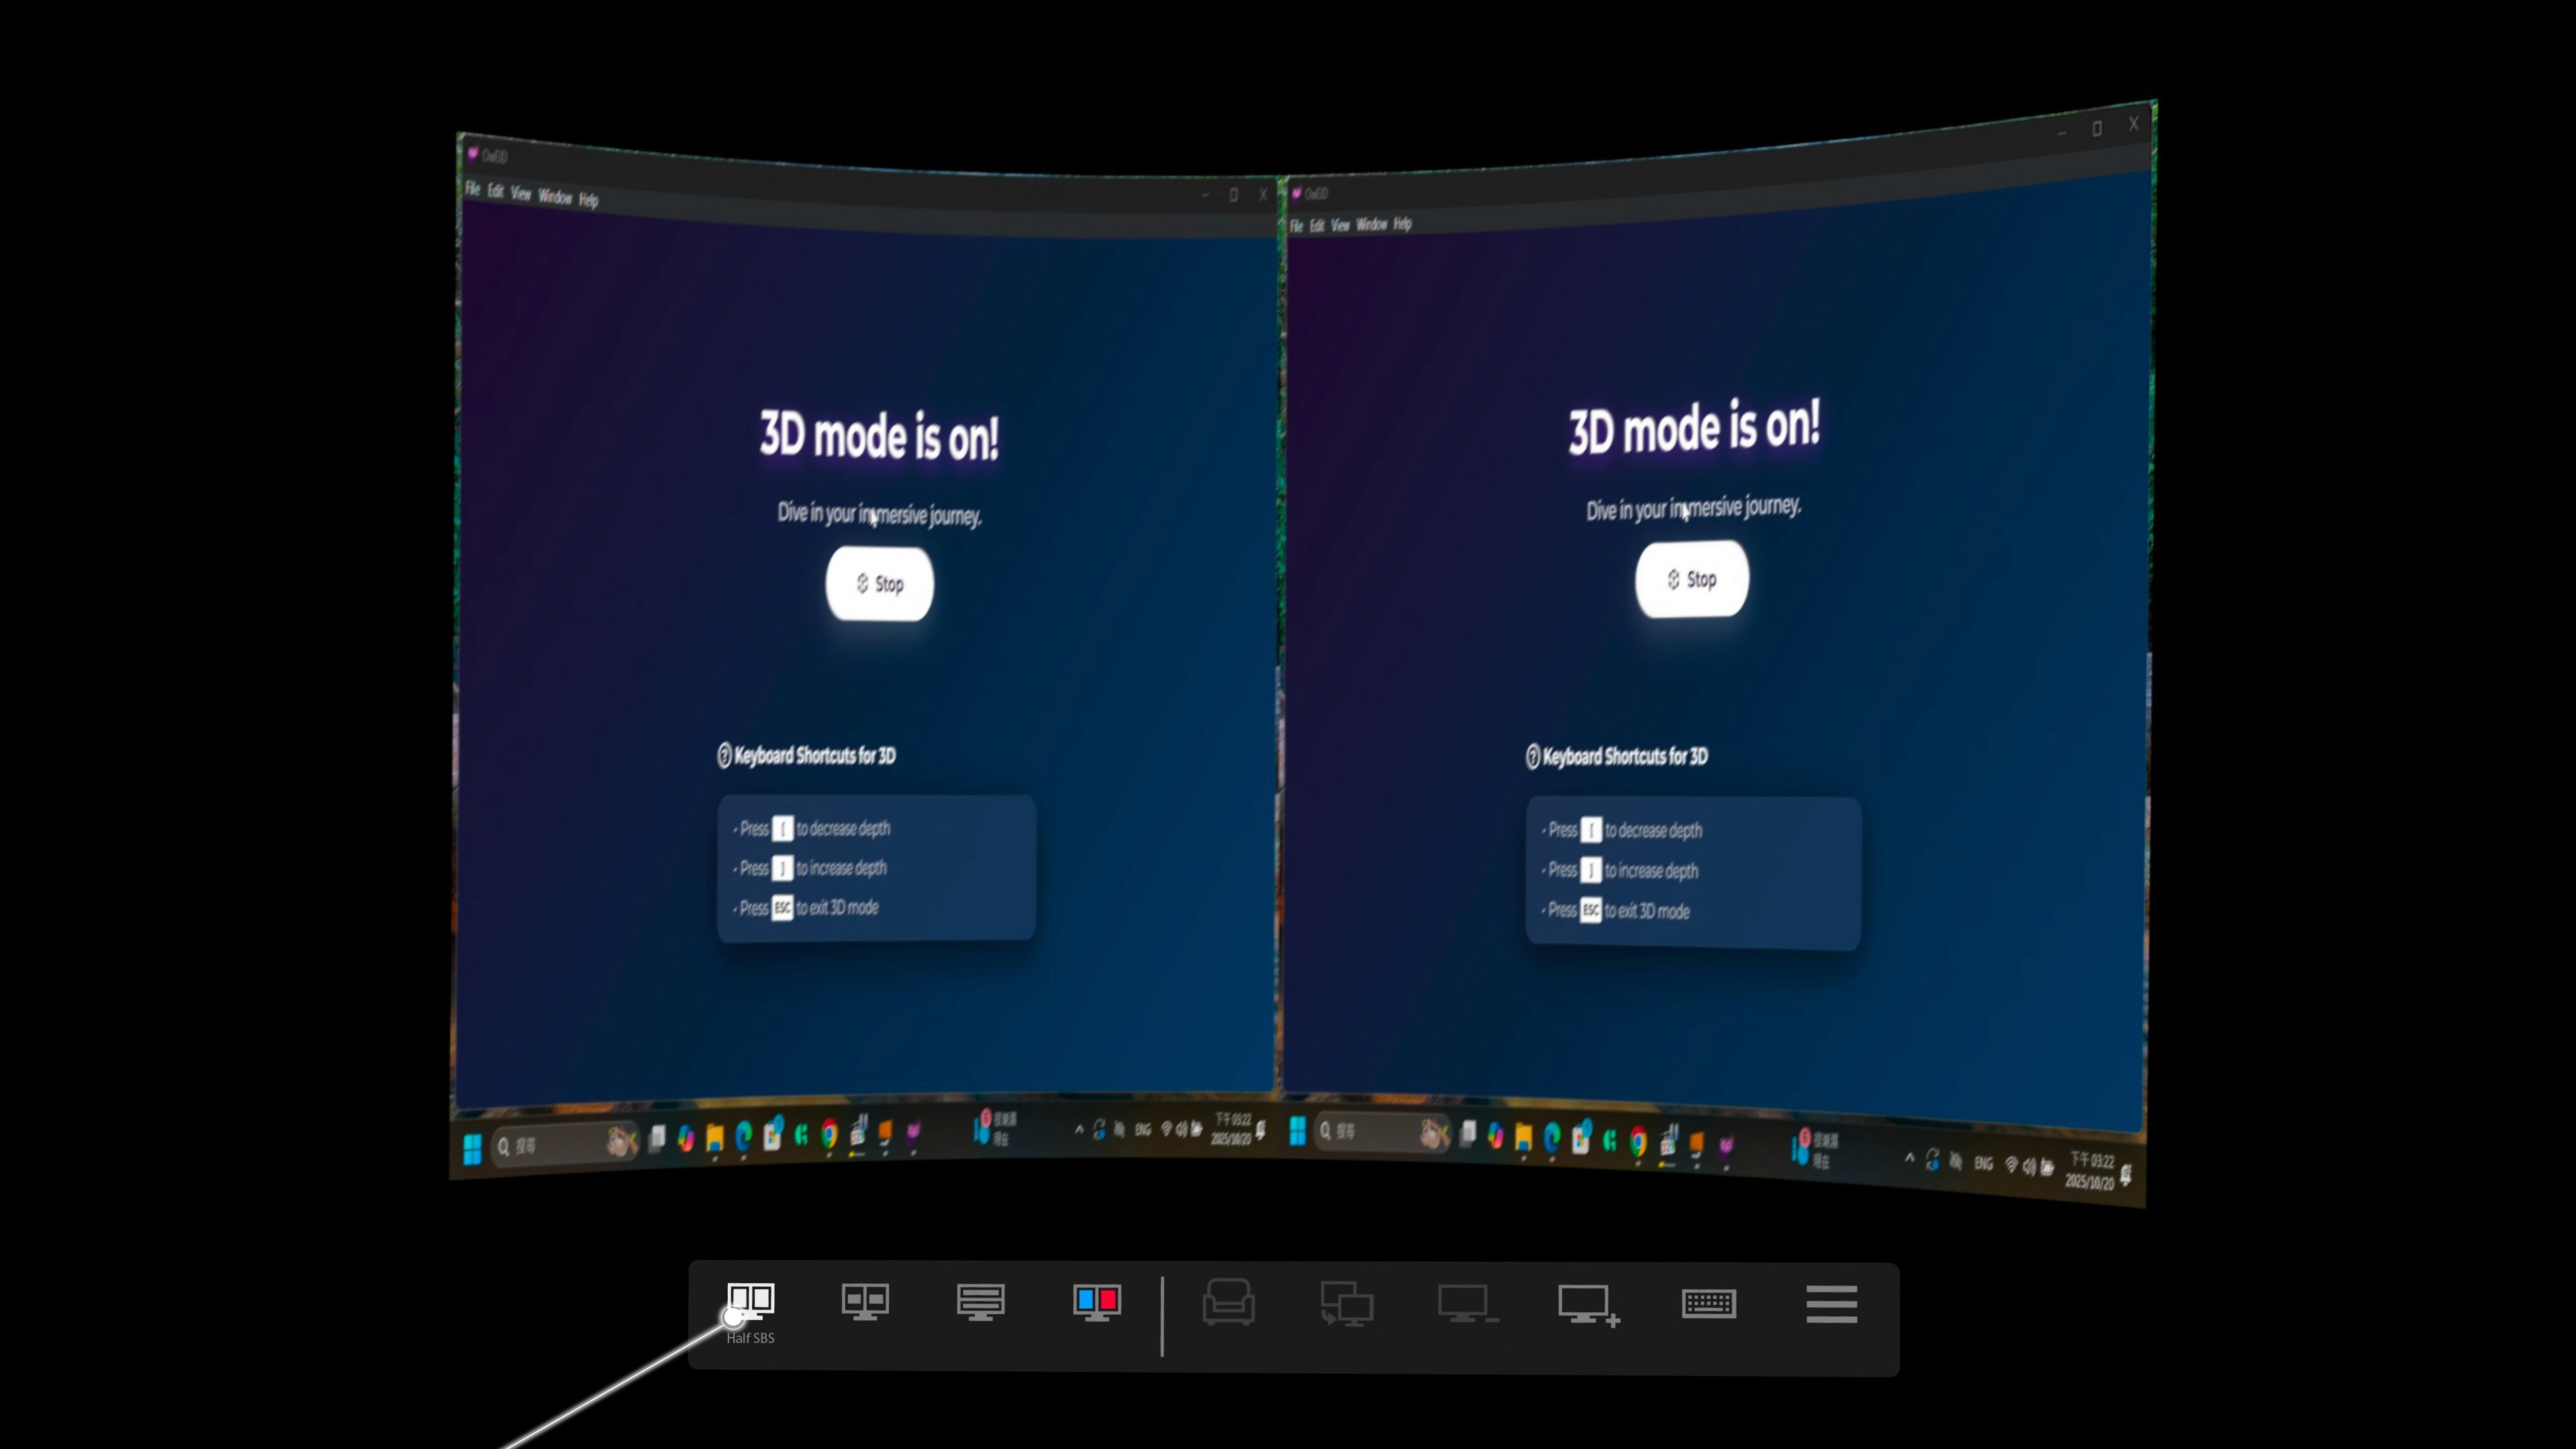
Tip: Click the bottom of the screen inside your headset to reveal the menu bar.
Enable "Half SBS" mode.
Note: You can find the Half SBS option on the left side of the menu bar.
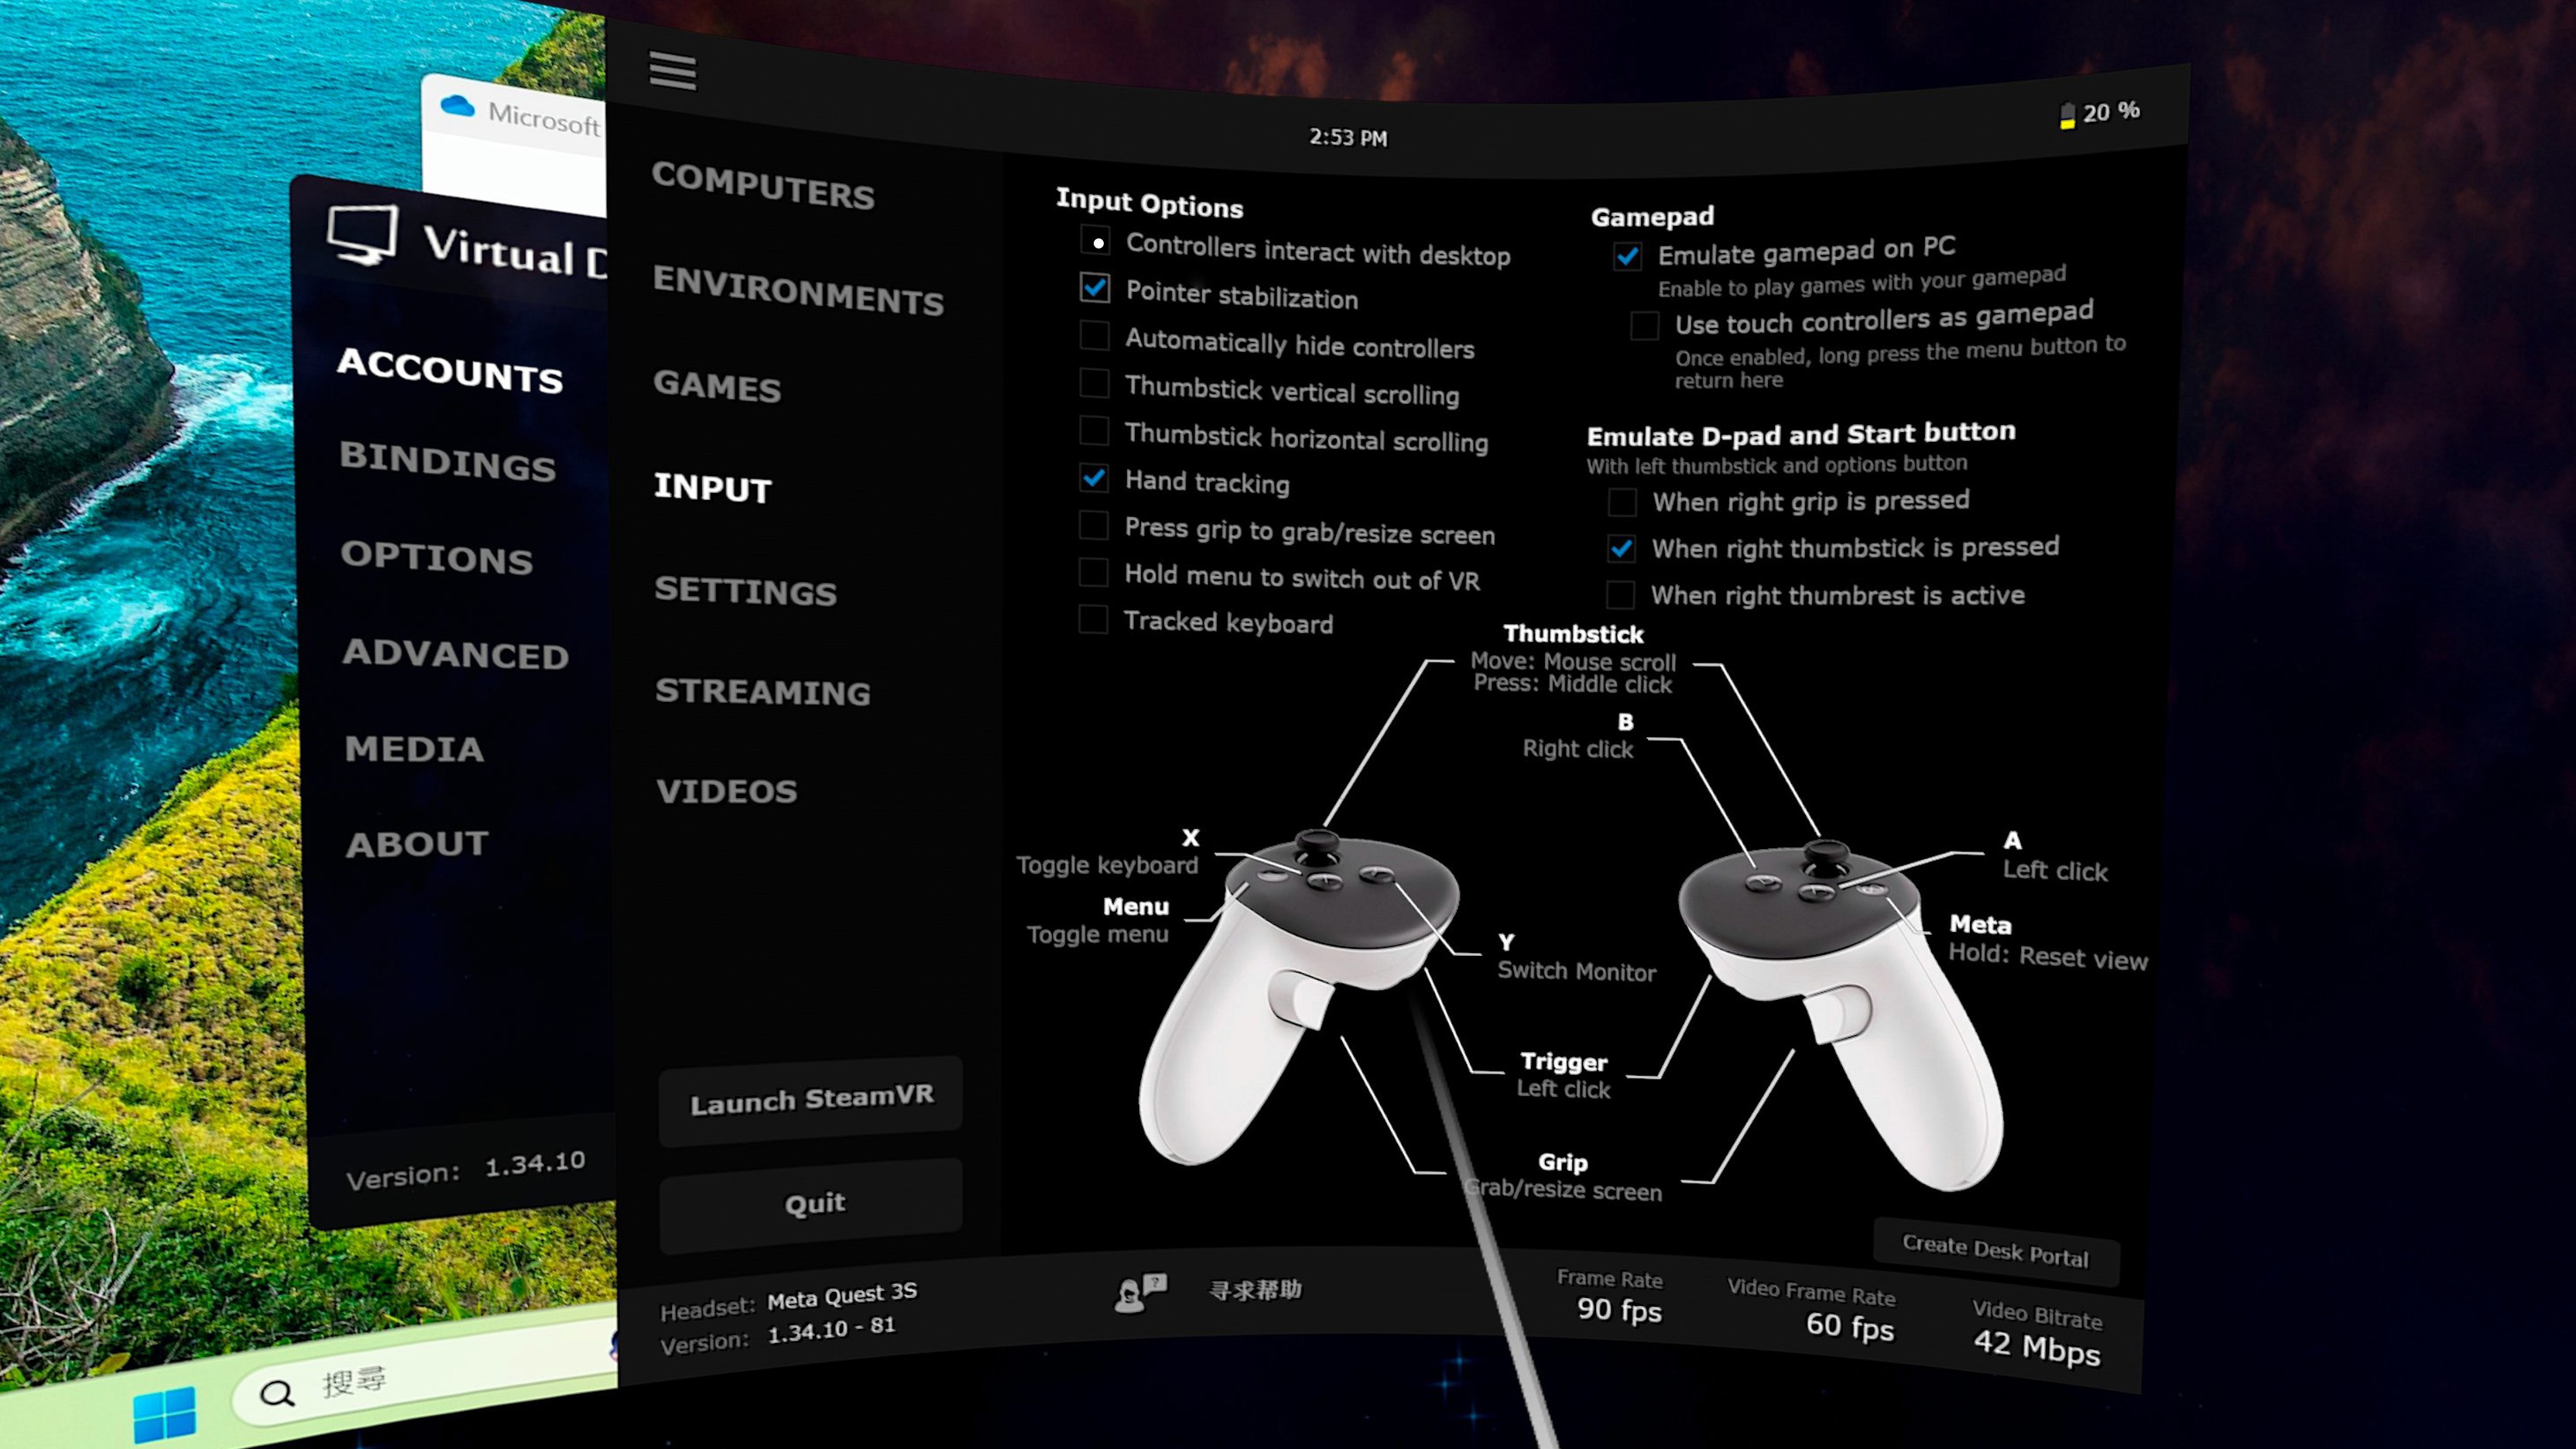
If you’re using the VR headset controller to interact with your desktop, it may cause a cursor conflict. For the best experience, please disable the controller’s desktop interaction feature in the Virtual Desktop interface and use your mouse instead.
If you are using Bigscreen:
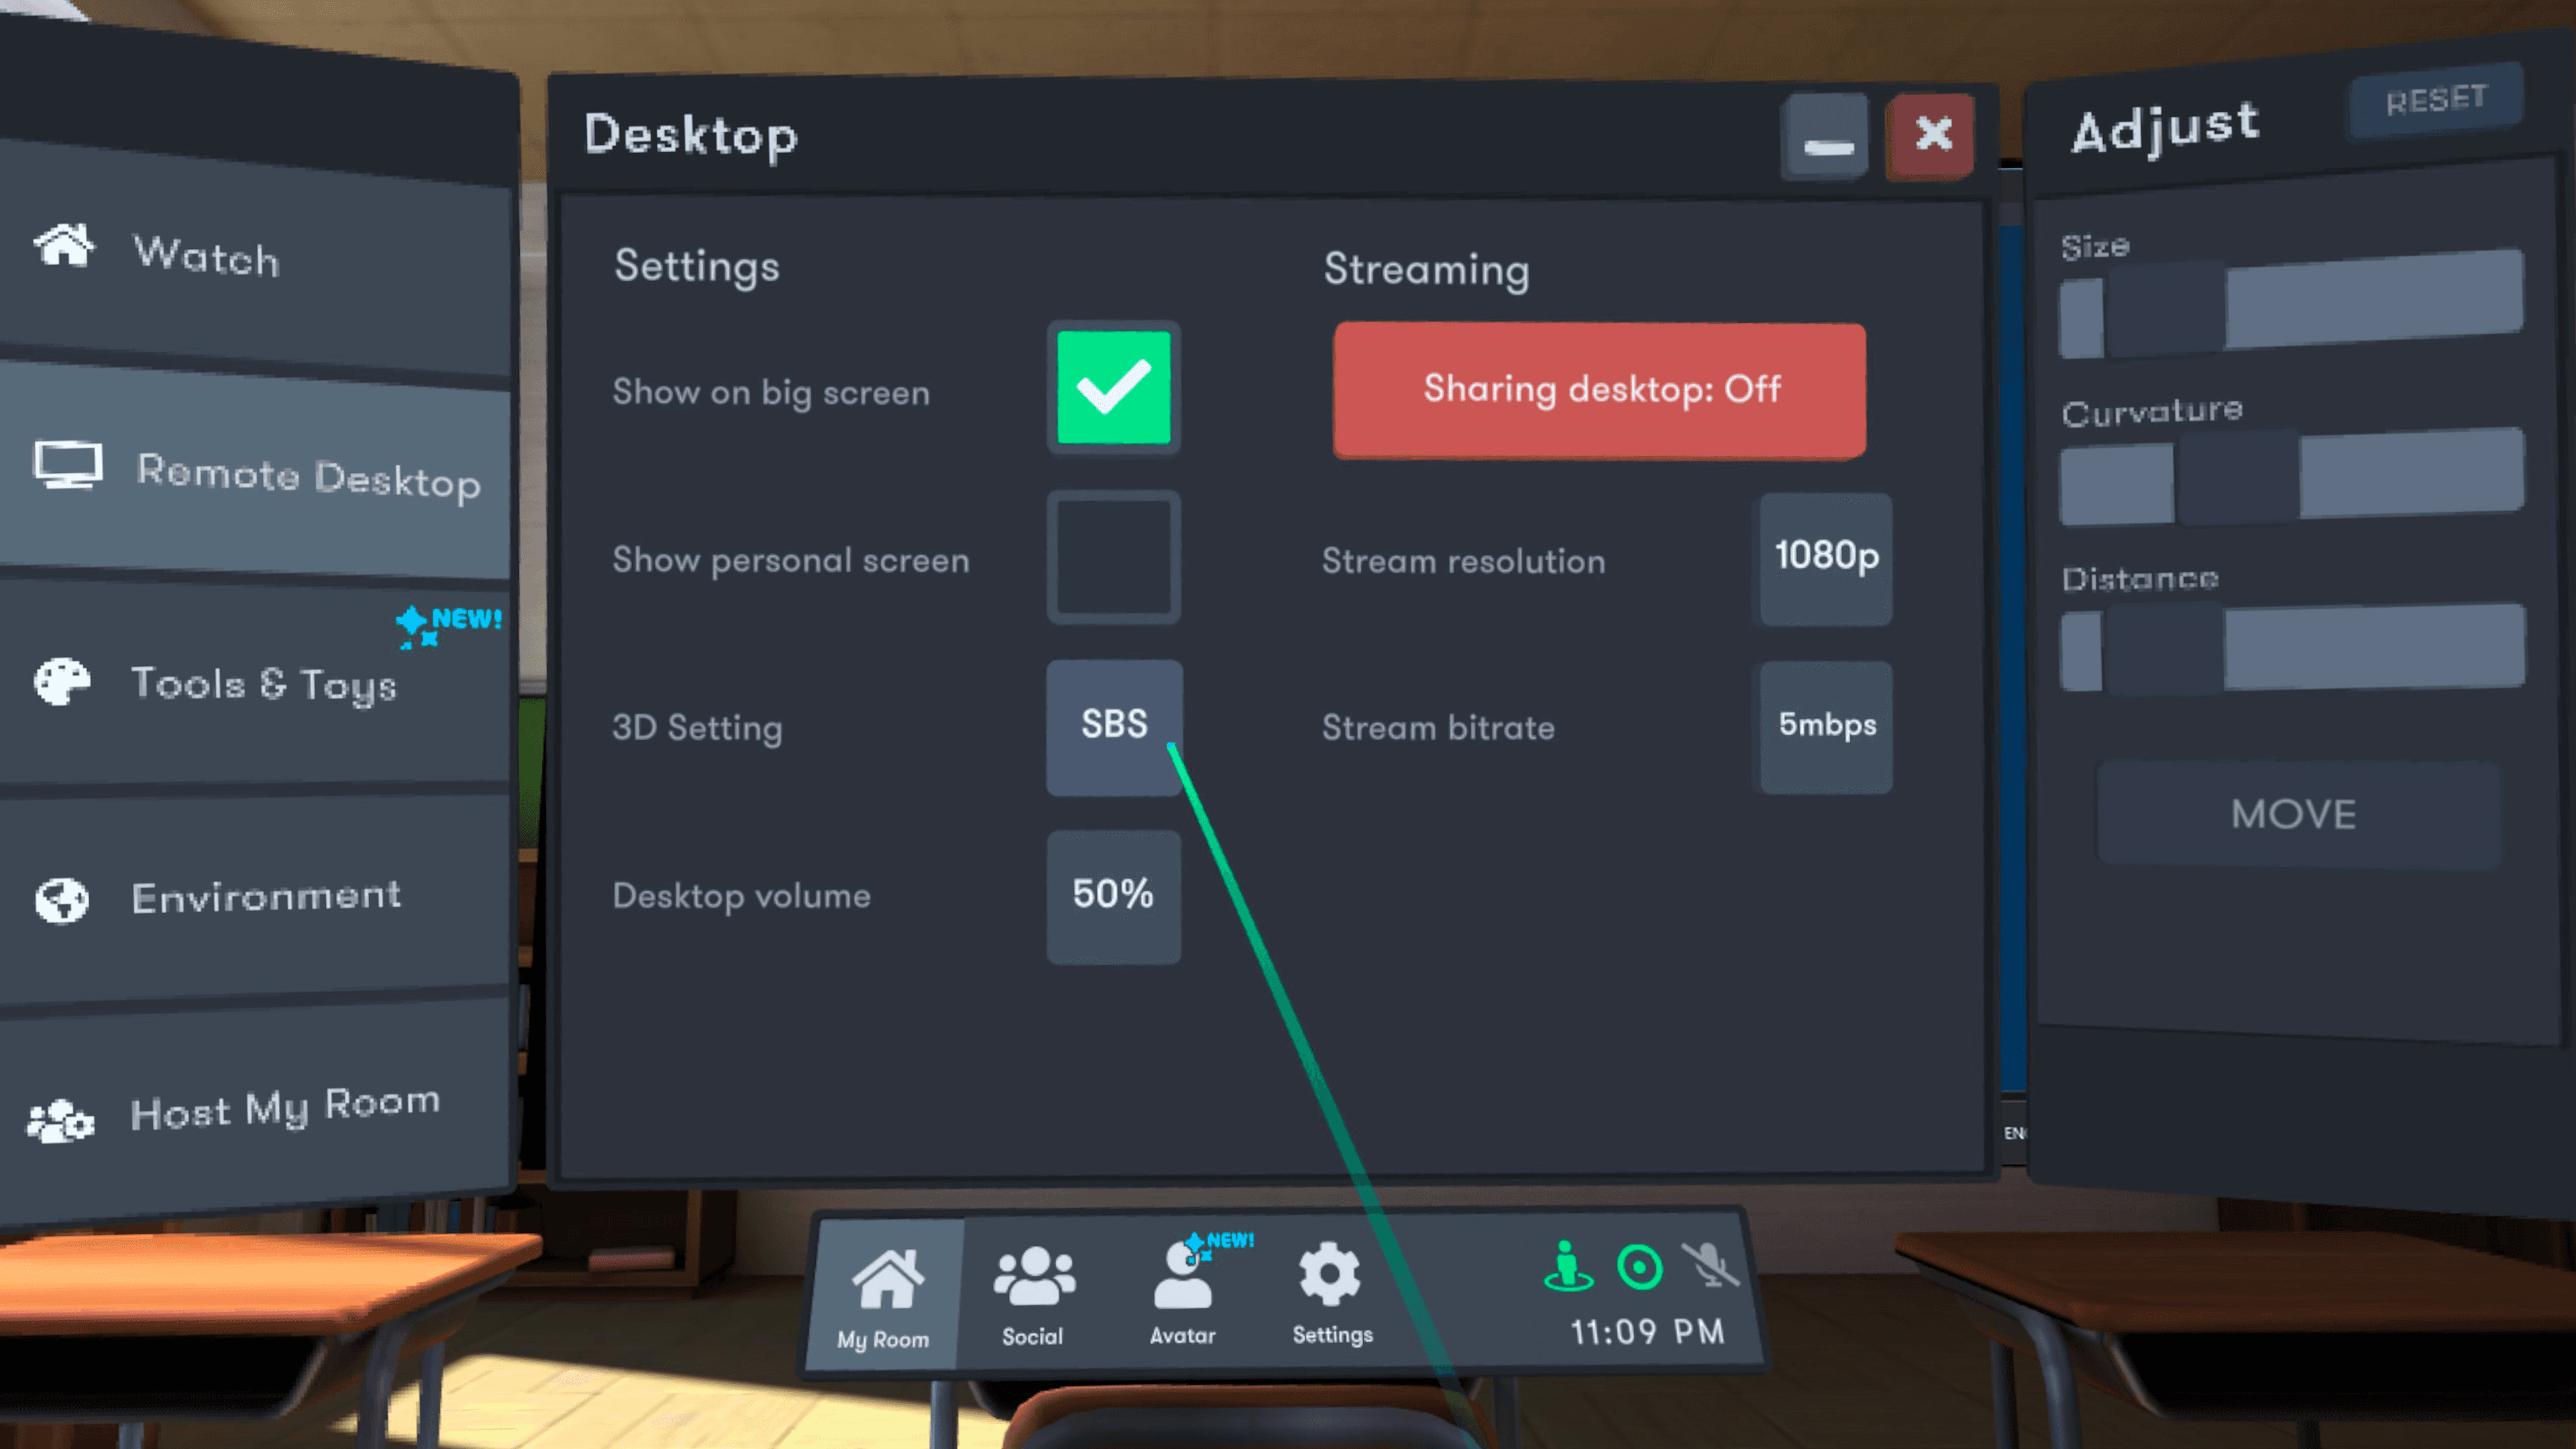
Open the Bigscreen menu (often on your wrist controller).
Go to My Room, then open 3D Settings and select SBS (Side-by-Side) mode.
Once you enable SBS mode, the two split images will correctly merge into one, and you will immediately see a clear, immersive stereoscopic 3D image. Your 3D creative journey begins now!

Hey there, Owl3D users!
Welcome to our guide. To experience the streaming magic of Owl3D Screen, you need to wirelessly connect your VR headset (like a Meta Quest) to your PC.
For the most stable and seamless experience, the Owl3D team strongly recommends using one of two fantastic applications to achieve this: Virtual Desktop or Bigscreen.
This guide will walk you step-by-step through setting them up to get your VR gear ready.
Your Pre-Flight Checklist (This is Crucial!)
A smooth streaming experience depends on the following conditions.
Please ensure you have them:
A Capable PC: Your computer needs sufficient specs to run 3D applications and stream them.
A Standalone VR Headset: E.g., Meta Quest 2/3/Pro, Pico 4, etc.
A Great Network Environment:
Connect your PC directly to your router with an Ethernet cable, and ensure your VR headset is connected to the 5GHz or 6GHz (Wi-Fi 6/6E) band of the very same network.
Recommended Option 1: How to Set Up Virtual Desktop (VD)
Virtual Desktop is one of our recommended solutions, well-known for its reliable streaming quality.
Step 1: The PC Setup (Computer Side)
Go to the Website: Browse to https://www.vrdesktop.net, and download the free App.
Set Your Name: Launch the Virtual Desktop app. In the "Accounts" tab, enter your exact VR platform username (e.g., your Meta/Oculus username).
Let it Run: Keep the Streamer app running in the background.
Step 2: The VR Setup (Headset Side)
Purchase the App: Go to your VR headset's store (e.g., Quest Store). Search for, purchase, and download the "Virtual Desktop" application.
Launch and Connect: Put on your headset and open Virtual Desktop.
Find Your PC: In the "Computers" list, you should see the PC name you just set up.
Auto-Connecting to your PC: Your desktop will automatically stream to your VR headset when ready.
Recommended Option 2: How to Set Up Bigscreen
Bigscreen is another excellent tool we recommend, which also provides stable streaming of your desktop to VR.
Step 1: The PC Setup (Computer Side)
Go to the Website and download: Browse to https://www.bigscreenvr.com, and download the "Bigscreen Remote Desktop" application.
Launch and Stream: Install and run it.
Log in to your account: Open the Bigscreen app on your computer and type in your ID.
Tip: Check that your VR headset and computer share the same Wi-Fi connection.
Step 2: The VR Setup (Headset Side)
Download the App: On your VR store, search for and download "Bigscreen" (it's free).
Enter your account: Put on your headset, open the Bigscreen app, and log in to your account.
Find Remote Desktop: Open the Bigscreen menu. Look under "My Room" and find "Remote Desktop."
Connection Successful: Your PC desktop will now appear on the virtual screen in Bigscreen.
Ready to Launch Owl3D Screen!
You're all set! Whether you chose Virtual Desktop or Bigscreen, please follow this exact order:
Connect and Launch Owl3D:
Make sure you are wearing your headset and that the Virtual Desktop or Bigscreen connection is active (you should see your PC desktop inside VR).
Return to your PC (you can do this via the virtual desktop in VR) and open your Owl3D Screen project. Click the "Start" button.
Switch to 3D (Half SBS) Mode:
Once Owl3D Screen starts, you will notice your PC screen inside VR splits into two side-by-side images. This will look distorted or doubled. This is normal!
You must now manually enable 3D viewing mode in your VR application:
If you are using Virtual Desktop :
Open the Virtual Desktop menu.
Tip: Click the bottom of the screen inside your headset to reveal the menu bar.
Enable "Half SBS" mode.
Note: You can find the Half SBS option on the left side of the menu bar.
If you’re using the VR headset controller to interact with your desktop, it may cause a cursor conflict. For the best experience, please disable the controller’s desktop interaction feature in the Virtual Desktop interface and use your mouse instead.
If you are using Bigscreen:
Open the Bigscreen menu (often on your wrist controller).
Go to My Room, then open 3D Settings and select SBS (Side-by-Side) mode.
Once you enable SBS mode, the two split images will correctly merge into one, and you will immediately see a clear, immersive stereoscopic 3D image. Your 3D creative journey begins now!


